Published in Web Development for Designers
on November 14, 2024

Bridge designers and developers for seamless teamwork

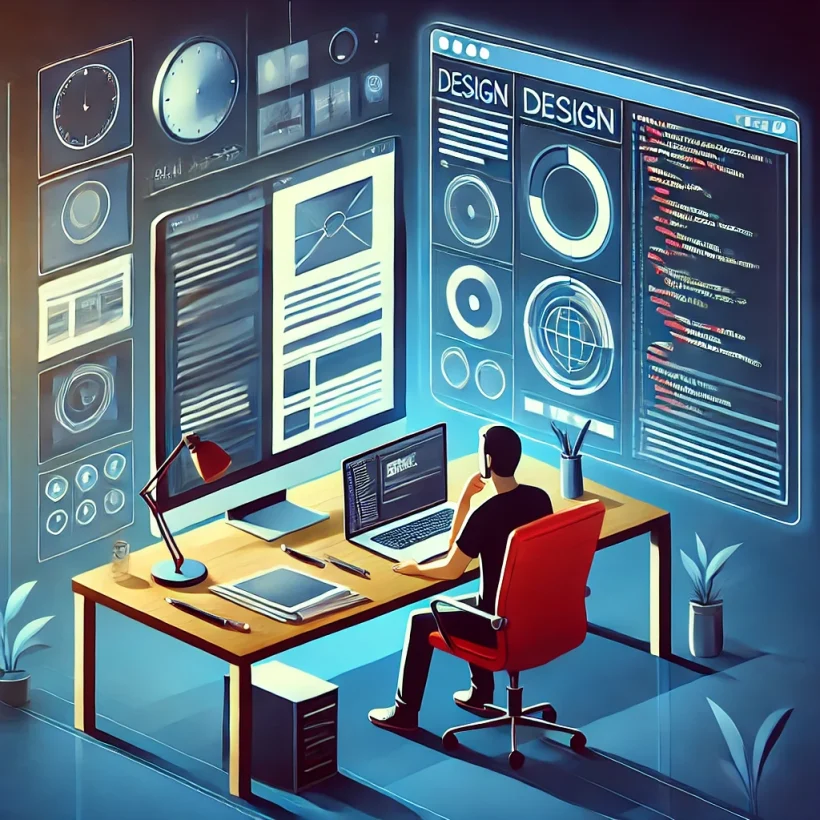
Creating a successful website or application requires input from both designers and developers. While designers focus on aesthetics and user experience, developers bring those designs to life with code. Bridging the gap between these two disciplines is crucial for seamless collaboration and efficient project delivery. Learning how to effectively bridge designers and developers can transform workflows, enhance communication, and result in high-quality outcomes.

This guide explores strategies, tools, and best practices to foster better collaboration between design and development teams.

Why Bridging Designers and Developers Is Important

The relationship between designers and developers is the backbone of any digital project. Misalignment can lead to delays, increased costs, and compromised quality.

  • Enhance Productivity: Better collaboration reduces misunderstandings and ensures smooth workflows.
  • Improve Project Outcomes: Unified efforts result in designs that are both visually appealing and technically feasible.
  • Foster Innovation: Collaborative teams are more likely to brainstorm creative solutions to complex problems.

Challenges in Bridging Designers and Developers

Designers and developers often face challenges that hinder effective collaboration.

Communication Gaps

Designers and developers use different terminologies, leading to potential miscommunication. For example, a designer might prioritize aesthetics, while a developer focuses on functionality.

Misaligned Expectations

Without clear communication, developers may misinterpret design intentions, and designers may overlook technical limitations.

Lack of Shared Tools

Using separate tools for design and development can create inefficiencies, as it requires constant back-and-forth and manual adjustments.

Strategies to Bridge Designers and Developers

Fostering collaboration between designers and developers involves clear communication, shared tools, and aligned goals.

Establish Clear Communication Channels

Effective communication is essential for bridging the gap between design and development teams.

  • Centralize Communication: Use tools like Slack or Microsoft Teams to create dedicated channels for discussions.
  • Schedule Regular Check-Ins: Hold frequent meetings to align goals, address concerns, and review progress.
  • Create Shared Terminology: Develop a glossary of terms to ensure everyone understands key concepts.

Use Collaborative Tools

Investing in collaborative tools helps streamline workflows and enhances transparency.

  • Figma: A cloud-based design tool that allows developers to inspect designs, view CSS properties, and export assets. Explore Figma.
  • Zeplin: Provides a bridge between design and development by translating designs into code-ready specs. Learn more at Zeplin.
  • InVision: Enables designers and developers to share prototypes, leave comments, and iterate collaboratively. Visit InVision.

Involve Developers Early

Incorporating developers in the design phase ensures feasibility and minimizes rework.

  • Design Feasibility Reviews: Developers can provide input on technical limitations and suggest alternatives.
  • Collaborative Brainstorming: Include developers in design discussions to bring fresh perspectives.

Build a Design System

A design system provides a set of reusable components and guidelines for both designers and developers, ensuring consistency.

  • Centralized Components: Store UI elements, such as buttons and forms, in a shared library.
  • Documentation: Provide clear instructions for using components, including design specifications and code snippets.
  • Tools: Use platforms like Storybook to create and share design systems.

Best Practices to Align Designers and Developers

Following best practices can improve alignment and foster a culture of collaboration.

Define Project Goals Together

Start each project by discussing objectives, target audiences, and desired outcomes with both teams. This ensures everyone is working toward the same vision.

Share Design Files Early

Providing developers with access to design files early in the process allows them to identify potential challenges and plan accordingly.

Use Responsive Design Principles

Designers should create responsive layouts that developers can easily translate into code. Platforms like Bootstrap provide a solid foundation for responsive designs.

Create Prototypes

Interactive prototypes help developers understand the intended user flow and interactions. Tools like Adobe XD are ideal for creating clickable prototypes.

Tools to Bridge Designers and Developers

Leveraging the right tools can significantly improve collaboration.

Abstract

Abstract acts as a version control system for design files, similar to Git for code.

  • Features:
    • Version tracking for designs.
    • Branching and merging for iterative improvements.
    • Integration with popular design tools like Sketch.

Visit Abstract.

GitHub

GitHub facilitates collaboration by enabling teams to manage and track changes in code.

  • Features:
    • Version control for codebases.
    • Collaborative workflows with pull requests and code reviews.
    • Integration with design tools through plugins.

Explore GitHub.

Avocode

Avocode simplifies the handoff process by bridging the gap between design and code.

  • Features:
    • Export assets directly from design files.
    • Generate CSS, HTML, and Swift code snippets.
    • Support for multiple design tools, including Sketch and Adobe XD.

Learn more at Avocode.

Benefits of Bridging Designers and Developers

Successfully bridging designers and developers leads to significant benefits for teams and projects.

Faster Turnaround Times

Collaborative workflows reduce delays caused by miscommunication and rework, enabling faster project delivery.

Higher Quality Outputs

Aligning design and development ensures that the final product matches the intended vision, resulting in superior quality.

Stronger Team Dynamics

Improved collaboration fosters mutual respect and understanding between designers and developers, creating a positive work environment.

Increased Innovation

Cross-functional collaboration encourages creativity and problem-solving, leading to innovative solutions.

Challenges in Bridging Teams

While collaboration has many benefits, challenges can arise.

Resistance to Change

Team members may be reluctant to adopt new workflows or tools. Address this by providing training and emphasizing the benefits of collaboration.

Misaligned Priorities

Designers and developers may prioritize different aspects of a project. Facilitate discussions to align goals and expectations.

Tool Overload

Using too many tools can overwhelm teams and hinder productivity. Choose a select few that address the most critical collaboration needs.

Conclusion

To bridge designers and developers, teams must prioritize communication, adopt collaborative tools, and align their workflows. By fostering better collaboration, businesses can ensure seamless project execution, delivering visually appealing and technically robust digital products.

Invest in tools like Figma, Zeplin, and GitHub, and focus on building a design system to streamline processes. With the right strategies and tools, your team can overcome challenges and achieve greater success in web design and development projects.

Published in Efficiency and Workflow
on November 12, 2024

Deliver web projects faster with quality intact

In a competitive digital landscape, the ability to deliver web projects faster is a key advantage for web developers, designers, and agencies. Speedy delivery doesn’t have to come at the expense of quality. With the right strategies, tools, and workflows, you can meet tight deadlines while maintaining high standards for performance and user experience.

This guide explores effective ways to streamline your development process, optimize team collaboration, and leverage modern technologies to expedite web projects without compromising quality.

Importance of Timely Delivery in Web Development

Timely delivery of web projects is essential for maintaining client satisfaction, staying competitive, and managing resources efficiently.

  • Client Expectations: Quick turnarounds help meet clients’ deadlines and build trust.
  • Increased Revenue: Faster completion of projects allows for taking on more work.
  • Competitive Edge: Being known for speed and quality attracts more clients.

However, achieving speed without sacrificing quality requires strategic planning and execution.

Planning for Success

Efficient web project delivery starts with a solid plan. Proper planning ensures resources are utilized effectively and eliminates unnecessary delays.

Define Project Scope

Clearly outline the project’s scope, including:

  • Features and functionalities required.
  • Design specifications.
  • Expected timelines.

Use project management tools like Trello or Asana to track progress and manage tasks.

Set Realistic Deadlines

While aiming for speed, avoid overpromising timelines. Discuss deadlines with your team and clients to ensure they are achievable.

Create a Detailed Workflow

Map out the workflow for your project. This includes identifying tasks, assigning responsibilities, and setting milestones.

Using Pre-Built Resources

Pre-built resources significantly reduce development time without compromising quality.

Leverage Frameworks

Frameworks like Bootstrap and Tailwind CSS provide pre-designed components and grid systems, allowing you to build responsive layouts faster.

Use Theme Builders

For WordPress projects, consider theme builders like Elementor or Divi. These tools simplify design creation with drag-and-drop functionality.

Integrate Plugins

Plugins can quickly add functionalities to websites without the need for custom coding. For example:

Automating Repetitive Tasks

Automation saves time by handling repetitive tasks, allowing your team to focus on more complex aspects of the project.

Automate Code Deployment

Tools like GitHub Actions and CircleCI automate code testing and deployment, ensuring changes are pushed quickly and securely.

Generate Code Snippets

Use tools like Emmet to generate HTML and CSS code snippets, reducing manual coding time.

Optimize Images

Automate image compression with tools like TinyPNG or ImageOptim to improve site performance without manual resizing.

Streamlining Collaboration

Effective team collaboration is critical to delivering web projects faster.

Centralize Communication

Use platforms like Slack or Microsoft Teams to centralize team communication and reduce delays caused by email threads.

Share Design Assets

Collaborative tools like Figma allow designers and developers to work on the same platform, ensuring seamless design handoff.

Implement Version Control

Version control systems like Git ensure that team members can work simultaneously on code without conflicts.

Testing Throughout the Process

Testing as you go prevents last-minute quality issues and ensures the project remains on track.

Conduct Unit Testing

Break down the code into smaller units and test each independently. Frameworks like Jest make this process efficient.

Perform Cross-Browser Testing

Ensure your project functions correctly across all major browsers using tools like BrowserStack.

Test Responsiveness

Check responsiveness on different screen sizes using Chrome DevTools or platforms like Responsively.

Optimizing for Performance

Faster delivery doesn’t mean sacrificing website performance. Performance optimization ensures quality remains intact.

Minimize CSS and JavaScript

Use tools like Terser or CSSNano to minify code, reducing load times.

Implement Caching

Add caching mechanisms like W3 Total Cache to improve page load speed.

Optimize Database Queries

Use efficient database queries and remove unnecessary data to enhance backend performance. For example, plugins like WP-Optimize can help clean up WordPress databases.

Benefits of Delivering Web Projects Faster

Mastering speed and efficiency in web development provides numerous benefits.

Enhanced Client Relationships

Quick turnarounds build client trust and satisfaction, fostering long-term relationships.

Increased Productivity

Streamlined processes free up time for additional projects or refining skills.

Improved Reputation

Being known for delivering quality work on time enhances your professional reputation.

Challenges and Solutions

Despite the benefits, delivering web projects faster can present challenges.

Balancing Speed and Quality

While speed is crucial, rushing can lead to mistakes. Use checklists and automated testing to maintain quality.

Handling Scope Creep

Scope creep can derail timelines. Prevent it by clearly defining the project scope and communicating changes with clients.

Keeping Teams Motivated

High-pressure deadlines can lead to burnout. Keep teams motivated with regular check-ins, clear communication, and recognition of their efforts.

Staying Ahead with Modern Tools

Modern tools continue to evolve, helping developers achieve faster results without compromising quality.

AI-Powered Tools

AI tools like Copilot assist with code generation, speeding up development tasks.

No-Code Platforms

Platforms like Webflow allow non-technical users to create websites quickly, freeing developers to focus on complex projects.

Continuous Integration and Delivery

Adopt CI/CD pipelines to automate testing and deployment, reducing errors and saving time. Tools like Jenkins are popular in this domain.

Conclusion

Delivering web projects faster is a crucial skill in today’s fast-paced industry, but it doesn’t mean sacrificing quality. By planning effectively, using pre-built resources, automating repetitive tasks, and optimizing collaboration, you can meet tight deadlines while exceeding client expectations.

Embrace modern tools and workflows, stay flexible to adapt to challenges, and prioritize performance to ensure every project you deliver is both timely and high-quality. With these strategies, you’ll solidify your reputation as a reliable and efficient web developer.

Published in WordPress Theme Development
on November 9, 2024

Build custom WordPress themes from scratch with ease

Building a custom WordPress theme from scratch is a rewarding process that allows developers to create tailored designs and functionality for unique business needs. Unlike pre-made themes, custom WordPress themes are designed to match specific branding requirements and optimize performance. This guide will take you through the essential steps to build custom WordPress themes and explore best practices for success.

Why Build Custom WordPress Themes

Custom WordPress themes provide flexibility and control over your website’s appearance and functionality.

  • Unique Design: Tailor your site to stand out from competitors with a fully customized look.
  • Optimized Performance: Avoid unnecessary bloat by only including the features you need.
  • Enhanced Functionality: Build features specific to your site’s purpose without relying on third-party plugins.
  • Scalability: Custom themes are easier to update and expand as your business grows.

Setting Up the Development Environment

Before you start building your theme, set up a local development environment to streamline coding and testing.

Choose a Local Server

Tools like Local or XAMPP provide a local server for running WordPress.

Install WordPress

Download WordPress from WordPress.org and install it on your local server. Create a new database for your project during setup.

Set Up Code Editor

Use a robust code editor like Visual Studio Code or Sublime Text to write your theme’s code efficiently.

Creating the Theme Folder

Navigate to the wp-content/themes/ directory in your WordPress installation and create a new folder for your theme. Name the folder according to your project, such as custom-theme.

Inside this folder, create the following essential files:

  • style.css: Defines the theme’s style and metadata.
  • index.php: The main template file for your theme.
  • functions.php: Adds functionality to your theme, such as registering menus or enqueuing scripts.

Building the Theme’s Core Files

Custom WordPress themes rely on several core files for functionality and layout.

Style.css

Start by adding metadata to the style.css file to register your theme in WordPress:

/*
Theme Name: Custom Theme  
Author: Your Name  
Description: A custom WordPress theme built from scratch.  
Version: 1.0  
*/  

Include basic CSS styles for your theme here or use an external CSS file.

Index.php

This is the primary template file that WordPress uses to render content. For now, include a basic HTML structure:

<!DOCTYPE html>  
<html <?php language_attributes(); ?>>  
<head>  
    <meta charset="<?php bloginfo( 'charset' ); ?>">  
    <title><?php wp_title(); ?></title>  
    <?php wp_head(); ?>  
</head>  
<body <?php body_class(); ?>>  
    <h1><?php bloginfo( 'name' ); ?></h1>  
    <p><?php bloginfo( 'description' ); ?></p>  
    <?php wp_footer(); ?>  
</body>  
</html>  

Functions.php

Use the functions.php file to add essential functionality:

  • Register navigation menus.
  • Enqueue styles and scripts.
  • Enable theme support for features like post thumbnails.

Example:

<?php  
function custom_theme_setup() {  
    add_theme_support( 'title-tag' );  
    add_theme_support( 'post-thumbnails' );  
    register_nav_menus( array(  
        'primary' => __( 'Primary Menu', 'custom-theme' )  
    ));  
}  
add_action( 'after_setup_theme', 'custom_theme_setup' );  
?>  

Structuring Templates

WordPress themes use a template hierarchy to render different types of content.

Header and Footer

Create header.php and footer.php files to organize reusable sections of your theme:

header.php:

<!DOCTYPE html>  
<html <?php language_attributes(); ?>>  
<head>  
    <meta charset="<?php bloginfo( 'charset' ); ?>">  
    <?php wp_head(); ?>  
</head>  
<body <?php body_class(); ?>>  
<header>  
    <h1><?php bloginfo( 'name' ); ?></h1>  
    <nav><?php wp_nav_menu( array( 'theme_location' => 'primary' ) ); ?></nav>  
</header>  

footer.php:

<footer>  
    <p>&copy; <?php echo date( 'Y' ); ?> <?php bloginfo( 'name' ); ?></p>  
    <?php wp_footer(); ?>  
</footer>  
</body>  
</html>  

Content Templates

Use separate files like page.php, single.php, and archive.php to define layouts for pages, single posts, and archives.

Example for single.php:

<?php get_header(); ?>  
<main>  
    <?php  
    while ( have_posts() ) : the_post();  
        the_title( '<h1>', '</h1>' );  
        the_content();  
    endwhile;  
    ?>  
</main>  
<?php get_footer(); ?>  

Adding Styling and Interactivity

Enqueue CSS and JavaScript

Use functions.php to add styles and scripts to your theme:

function custom_theme_scripts() {  
    wp_enqueue_style( 'main-style', get_stylesheet_uri() );  
    wp_enqueue_script( 'main-script', get_template_directory_uri() . '/js/main.js', array(), '1.0', true );  
}  
add_action( 'wp_enqueue_scripts', 'custom_theme_scripts' );  

Responsive Design

Incorporate responsive design principles by using media queries in your CSS or frameworks like Bootstrap.

Testing and Debugging

Use Debugging Tools

Enable WordPress debugging to identify issues during development:

define( 'WP_DEBUG', true );  

Validate Code

Use tools like W3C Validator for HTML and CSS Validation Service to ensure code quality.

Test Across Devices

Use browser developer tools or platforms like BrowserStack to test your theme on different devices and browsers.

Benefits of Custom WordPress Themes

Full Control

Building your theme from scratch gives you complete control over design and functionality.

Improved Performance

Custom themes avoid unnecessary code, resulting in faster loading times.

Unique Branding

Create a website that reflects your brand’s unique identity, setting it apart from competitors.

Conclusion

Learning to build custom WordPress themes is a valuable skill for developers and businesses looking to create unique and optimized websites. By following the steps outlined in this guide, you can design a theme tailored to your specific needs while maintaining flexibility for future growth.

Leverage tools like Local for development, frameworks like Bootstrap for responsiveness, and WordPress’s built-in functions to ensure success. With time and practice, you’ll master the art of creating custom themes that meet any design and functionality requirements.

Published in Trends and Innovations
on November 7, 2024

Future of PSD-to-HTML conversion powered by AI innovations

The web development industry is constantly evolving, and the future of PSD-to-HTML conversion is no exception. Traditionally, converting Photoshop Design (PSD) files into Hypertext Markup Language (HTML) required manual coding, demanding significant time and expertise. However, advancements in artificial intelligence (AI) are transforming this process, making it faster, more efficient, and highly accurate.

This article explores how AI is revolutionizing PSD-to-HTML conversion, the tools driving this change, and what the future holds for designers and developers.

Understanding PSD-to-HTML Conversion

PSD-to-HTML conversion involves transforming static Photoshop designs into functional HTML code that forms the backbone of websites. This process typically includes:

  • Slicing the Design: Breaking the PSD file into individual components like headers, images, and buttons.
  • Writing HTML Code: Translating these design components into HTML structure.
  • Styling with CSS: Adding styles using Cascading Style Sheets (CSS) to match the design specifications.

While manual conversion provides precision, it is time-consuming and prone to human error.

Role of AI in PSD-to-HTML Conversion

AI brings automation and precision to PSD-to-HTML conversion by analyzing design files and generating code directly.

Speed and Efficiency

AI-driven tools can process PSD files in minutes, eliminating the need for manual slicing and coding. This significantly reduces turnaround times for web projects.

Improved Accuracy

AI algorithms ensure that the generated code aligns perfectly with the design, minimizing errors and inconsistencies.

Enhanced Scalability

With AI, developers can manage multiple projects simultaneously, as repetitive tasks are automated.

Accessibility

AI tools democratize web development by enabling non-technical users to create websites from PSD designs without coding expertise.

AI Tools Shaping the Future of PSD-to-HTML

Several AI-powered tools are leading the charge in PSD-to-HTML conversion, providing designers and developers with innovative solutions.

Avocode

Avocode simplifies the PSD-to-HTML process by enabling design handoff and code export directly from PSD files.

  • Features:
    • Automated code generation for HTML and CSS.
    • Cross-platform compatibility for various design file types.
    • Collaborative features for teams.

Learn more at Avocode.

Export Kit

Export Kit converts PSD files into HTML, CSS, and JavaScript code in a matter of seconds.

  • Features:
    • Supports advanced styles and layouts.
    • Generates responsive code for mobile devices.
    • Integrates with popular development environments.

Explore Export Kit.

Pictory

Pictory uses AI to transform design files into HTML and CSS, focusing on user-friendly workflows.

  • Features:
    • Intuitive interface for designers.
    • Real-time previews of generated code.
    • Built-in optimization for faster loading speeds.

Visit Pictory.

Benefits of AI in PSD-to-HTML Conversion

The integration of AI in PSD-to-HTML conversion offers several advantages for designers, developers, and businesses.

Faster Development Cycles

By automating time-intensive tasks, AI reduces the time required to launch websites, enabling faster project completion.

Cost-Effectiveness

AI-driven tools eliminate the need for extensive manual coding, lowering development costs without compromising quality.

Responsive Design Integration

AI tools ensure that the generated HTML and CSS are responsive, adapting seamlessly to different screen sizes and devices.

Consistency and Quality

With machine precision, AI tools deliver consistent and high-quality results, maintaining design integrity across projects.

Challenges and Limitations

While AI is transforming PSD-to-HTML conversion, there are challenges to consider.

Complex Design Interpretations

AI may struggle with highly intricate designs or custom animations, requiring manual intervention to achieve desired results.

Dependency on Tools

Over-reliance on AI tools can limit developers’ coding expertise and flexibility in customizing outputs.

Compatibility Issues

Some AI-generated code may require adjustments to ensure compatibility with specific browsers or frameworks.

Best Practices for Using AI in PSD-to-HTML Conversion

To maximize the benefits of AI, designers and developers should follow these best practices:

Optimize PSD Files

Ensure PSD files are well-organized with labeled layers and grouped components. This makes it easier for AI tools to interpret and process designs accurately.

Review and Refine Code

AI-generated code should always be reviewed and refined to meet project-specific requirements and optimize performance.

Stay Updated on Tools

As AI technology evolves, staying informed about the latest tools and features ensures you leverage the best solutions for your projects.

Combine Manual and Automated Approaches

Use AI tools for repetitive tasks while applying manual coding for complex customizations or unique design elements.

Future Trends in PSD-to-HTML Conversion

The future of PSD-to-HTML conversion is shaped by emerging trends in AI and web development.

AI-Driven Customization

As AI algorithms become more sophisticated, tools will offer greater customization options, enabling developers to fine-tune code for specific frameworks and platforms.

Integration with No-Code Platforms

AI-powered PSD-to-HTML conversion will increasingly integrate with no-code platforms, empowering non-developers to create functional websites effortlessly.

Enhanced Collaboration

Future tools will focus on collaboration, allowing designers, developers, and stakeholders to work together seamlessly in real-time.

Machine Learning Enhancements

Machine learning will enable AI tools to learn from user preferences and past projects, delivering more accurate and personalized outputs over time.

Conclusion

The future of PSD-to-HTML conversion is undeniably exciting, with AI transforming the way designers and developers approach web projects. By automating repetitive tasks, improving accuracy, and enabling scalability, AI-powered tools are making web development more accessible and efficient than ever.

As AI technology continues to evolve, embracing these innovations will be essential for staying competitive in the web development industry. Whether you’re a seasoned developer or a design professional, leveraging AI tools like Avocode and Export Kit can streamline your workflow and help you create high-quality websites with ease.

Published in Affordable Web Solutions
on November 5, 2024

Affordable web development for small businesses benefits

In today’s digital age, having a strong online presence is essential for small businesses. However, the cost of web development often becomes a significant barrier. The good news is that affordable web development options are now available, enabling small businesses to build professional, functional websites without breaking the bank.

This guide explores the benefits of affordable web development, its impact on small businesses, and practical ways to create a high-quality website on a budget.

Why Affordable Web Development Matters

Small businesses face unique challenges, including limited budgets and resources. Affordable web development helps overcome these hurdles by providing access to essential digital tools and services.

  • Cost Efficiency: Affordable solutions allow small businesses to allocate resources to other areas, such as marketing and product development.
  • Access to Quality: Budget-friendly options no longer mean compromising on design or functionality.
  • Scalability: Affordable websites can grow with your business, accommodating new features and content over time.

Features of Affordable Web Development

Affordable web development offers robust features tailored to the needs of small businesses.

Responsive Design

Responsive websites adapt seamlessly to different devices, ensuring an optimal user experience on desktops, tablets, and smartphones.

Easy Content Management

Platforms like WordPress and Wix offer user-friendly content management systems, enabling small business owners to update their websites without technical expertise.

Learn more about WordPress at WordPress.org and Wix at Wix.com.

SEO Optimization

Affordable web development often includes basic SEO tools to help your site rank on search engines. Features may include meta tag editing, URL customization, and XML sitemaps.

E-commerce Integration

For businesses selling products or services online, affordable development solutions can integrate e-commerce functionalities such as payment gateways and product pages.

Benefits of Affordable Web Development

Investing in affordable web development provides small businesses with numerous advantages.

Enhances Brand Visibility

A professional website serves as your business’s online storefront, showcasing your brand, products, and services. A well-designed site builds trust and credibility, encouraging potential customers to engage with your business.

Boosts Customer Engagement

Features like contact forms, live chat, and social media integration make it easy for customers to connect with your business. Affordable development options often include these features as standard.

Expands Market Reach

An online presence allows small businesses to reach a broader audience, including customers beyond their local area. A website optimized for SEO ensures your business appears in relevant search results.

Increases Conversion Rates

Affordable web development ensures your site is not only visually appealing but also optimized for conversions. Clear calls-to-action, fast loading times, and intuitive navigation encourage visitors to take action, whether it’s making a purchase or signing up for a newsletter.

Saves Time and Resources

Affordable solutions often include pre-designed templates and drag-and-drop builders, significantly reducing the time required to launch a website. This allows business owners to focus on other critical tasks.

Choosing the Right Affordable Web Development Solution

Selecting the right platform or provider is essential to maximize the benefits of affordable web development.

Evaluate Your Needs

Determine the primary goals of your website. Do you need a simple portfolio site, a blog, or a full-fledged e-commerce platform? Understanding your requirements helps narrow down your options.

Compare Platforms

Research popular web development platforms to find one that fits your needs and budget.

  • WordPress: Ideal for businesses seeking flexibility and scalability.
  • Wix: Best for beginners looking for an intuitive drag-and-drop builder.
  • Squarespace: Offers sleek, modern templates suitable for creative industries.

Assess Support and Features

Ensure the platform or provider offers adequate customer support and the features you need, such as hosting, security, and SEO tools.

Tips for Building a Cost-Effective Website

Creating a high-quality website on a budget requires strategic planning and execution.

Start with a Template

Using pre-designed templates reduces costs while providing a professional look. Platforms like WordPress and Shopify offer thousands of customizable templates.

Optimize Content

Create concise, engaging content that aligns with your brand message. High-quality images and videos enhance the visual appeal of your site. Use free tools like Canva for graphic design (Canva).

Prioritize Essential Features

Focus on must-have features like mobile responsiveness, contact forms, and basic SEO. Additional functionalities can be added later as your business grows.

Leverage Free Plugins and Tools

Many platforms offer free plugins and tools to extend your site’s functionality. For instance:

  • Use Yoast SEO for search engine optimization (Yoast).
  • Add analytics tracking with Google Analytics (Google Analytics).

DIY Where Possible

If you’re tech-savvy, consider handling parts of the development process yourself, such as content creation or basic customization.

Affordable Web Development Providers

Several companies and platforms specialize in affordable web development for small businesses.

Web.com

Offers budget-friendly website packages, including domain registration, hosting, and customizable templates. Learn more at Web.com.

Shopify

Ideal for e-commerce businesses, Shopify provides affordable plans with built-in e-commerce tools. Explore options at Shopify.

Bluehost

Bluehost combines hosting services with website-building tools, making it a popular choice for WordPress users. Visit Bluehost.

Maintaining Your Affordable Website

After launching your site, regular maintenance is essential to ensure it remains functional and relevant.

Update Content Regularly

Keep your website fresh by updating content, adding blog posts, or showcasing new products.

Monitor Performance

Use tools like Google Analytics to track visitor behavior and identify areas for improvement.

Check for Broken Links

Broken links can harm your SEO and frustrate visitors. Tools like Broken Link Checker can help identify and fix these issues.

Invest in Security

Affordable websites can still be secure. Use SSL certificates and update plugins or software regularly to protect your site from vulnerabilities.

Conclusion

Affordable web development empowers small businesses to establish a professional online presence without exceeding their budgets. By leveraging responsive design, user-friendly tools, and scalable platforms, you can create a high-quality website that enhances your brand visibility, customer engagement, and revenue potential.

Start your journey toward an affordable website today by exploring platforms like WordPress, Wix, and Shopify. With the right strategy and tools, achieving your business goals online is well within reach.

Published in Pixel-Perfect Design
on November 2, 2024

Achieve pixel-perfect results in front-end development with precision

Pixel-perfect development is the gold standard in web design and front-end development, ensuring that every element aligns perfectly with the intended design. For developers, mastering this skill not only enhances the user experience but also builds trust with clients and stakeholders. Learning how to achieve pixel-perfect results requires attention to detail, the right tools, and a structured approach.

This guide explores strategies, tools, and best practices to ensure precision and consistency in your front-end development projects.

Understanding Pixel-Perfect Development

Pixel-perfect development means ensuring that a website or application matches its design mockups exactly, down to the smallest details. This involves aligning visual elements, maintaining consistent spacing, and ensuring design integrity across devices.

Key benefits include:

  • Enhanced User Experience: Consistent and precise layouts improve usability and aesthetics.
  • Brand Integrity: Accurate implementation reflects professionalism and brand consistency.
  • Client Satisfaction: Meeting design expectations builds trust with clients and stakeholders.

Tools to Achieve Pixel-Perfect Results

Using the right tools can significantly streamline the pixel-perfect development process.

Design Software

Work with high-quality design files from software like:

  • Figma: Collaborative interface design tool. Learn more at Figma.
  • Adobe XD: Comprehensive tool for designing user experiences. Explore Adobe XD.
  • Sketch: A vector-based design tool widely used in UI/UX. Check out Sketch.

Browser Extensions

Browser extensions help compare your implementation with the design:

  • PerfectPixel by WellDoneCode: Overlay design mockups on a webpage for alignment checks. Install from Chrome Web Store.
  • PixelSnap: Measure and ensure pixel-perfect alignment directly on the screen.

Development Tools

Use tools that enhance precision in coding and layout management:

  • CSS Frameworks: Tailwind CSS or Bootstrap offer structured styling options. Visit Tailwind CSS or Bootstrap.
  • Grid and Flexbox: CSS grid and flexbox systems ensure consistent layouts. Learn CSS grid at MDN Web Docs.

Key Steps to Achieve Pixel-Perfect Results

Achieving precision in front-end development requires a methodical approach, from setting up your project to refining the final product.

Analyze the Design

Start by thoroughly reviewing the design mockups. Identify:

  • Fonts and typography specifications.
  • Colors, gradients, and shadows.
  • Padding, margins, and spacing for elements.

Document these details to ensure they are not overlooked during development.

Set Up a Design System

A design system creates consistency in your development process. Include:

  • Global styles for typography and colors.
  • Components and reusable elements.
  • Spacing scales for padding and margins.

Use Accurate Measurements

Convert design specifications into CSS properties accurately. For instance:

  • Use rem or em units for font sizes to maintain scalability.
  • Implement exact pixel values for widths, heights, and spacing when required.

Testing for Pixel-Perfect Accuracy

Testing is essential to ensure your implementation matches the design mockup perfectly.

Compare Designs and Implementation

Overlay the design file on your live webpage using tools like PerfectPixel. Adjust layouts until the alignment is precise.

Cross-Browser Testing

Test your site across multiple browsers to ensure consistent rendering. Use tools like:

Test Responsiveness

Ensure the design adapts seamlessly to various screen sizes. Tools like Chrome DevTools or Responsively can help simulate different devices.

Addressing Challenges in Pixel-Perfect Development

Developers often face challenges when striving for pixel-perfect results. Here’s how to tackle common issues:

Variations Across Browsers

Different browsers render elements slightly differently. Use CSS resets and normalize styles with libraries like Normalize.css.

Performance Impact

Heavy styling can slow down your site. Optimize performance by:

  • Minimizing CSS files with tools like Autoptimize.
  • Using modern image formats like WebP.

Handling Client Feedback

Clients may request changes after implementation. Maintain clear communication and use collaborative tools like InVision for feedback integration.

Best Practices for Pixel-Perfect Development

Adhering to best practices ensures efficiency and accuracy in your workflow.

Create a Style Guide

A style guide helps maintain consistency across pages. Include guidelines for typography, colors, and component styling.

Use Version Control

Track changes and collaborate with team members using Git. Platforms like GitHub or GitLab are essential for version control.

Keep Code Clean

Write modular and reusable code to simplify maintenance and updates. Follow CSS methodologies like BEM (Block Element Modifier) for organized styling.

Benefits of Pixel-Perfect Development

Prioritizing precision in front-end development offers several advantages:

  • Better User Experience: Users enjoy a seamless and visually appealing interface.
  • Higher Client Satisfaction: Meeting design expectations builds client trust.
  • Stronger Brand Perception: Consistent design enhances brand professionalism.

Conclusion

Achieving pixel-perfect results in front-end development requires a blend of meticulous attention to detail, the right tools, and a structured approach. By leveraging design tools like Figma, testing with browser extensions like PerfectPixel, and adhering to best practices, you can ensure your implementation aligns perfectly with the intended design.

Whether you’re developing a personal project or working with clients, following the strategies outlined in this guide will help you consistently achieve pixel-perfect results, elevating your web design projects to a professional standard.

Published in Blog
on April 6, 2020

WordPress customization tips for tailored website design

WordPress is one of the most versatile and user-friendly platforms for creating websites. With endless customization options, it empowers users to design websites that reflect their brand identity and functionality requirements. However, customizing WordPress effectively requires the right strategies and tools to ensure your site remains fast, secure, and scalable. Below you will find some WordPress customization tips.

This guide shares essential WordPress customization tips to help you enhance your site while maintaining its performance and usability.

Why WordPress Customization Is Important

Customizing your WordPress site allows you to tailor it to your unique needs and preferences.

  • Reflect Brand Identity: Custom themes and designs create a unique online presence.
  • Enhance Functionality: Add features to meet specific user requirements.
  • Improve User Experience: Tailor navigation, layout, and content for your audience.
  • Boost SEO: Optimize structure and content to rank higher on search engines.

Effective customization ensures that your WordPress site aligns with your goals while delivering a seamless experience for visitors.

Start with the Right Theme

Choosing the right theme is the foundation of WordPress customization.

Select a Customizable Theme

Opt for themes that offer extensive customization options without requiring advanced coding skills. Themes like Astra or GeneratePress are lightweight and highly customizable.

Use a Child Theme

A child theme allows you to modify your site’s design without affecting the original theme’s files. This ensures that updates won’t overwrite your changes. Learn more about child themes at WordPress Codex.

Utilize Page Builders

Page builders simplify customization by providing drag-and-drop interfaces to create layouts.

Elementor

Elementor is a popular page builder with intuitive tools for designing pages and adding custom elements.

WPBakery

WPBakery Page Builder offers advanced customization options and integrates seamlessly with many themes. Explore it at WPBakery.

Customize the Header and Footer

Your website’s header and footer are key elements that impact user experience and branding.

Edit with Theme Customizer

Access the WordPress Theme Customizer to modify the header and footer. You can add menus, logos, and widgets.

Use Plugins

Plugins like Header Footer Code Manager allow you to add custom scripts or widgets to these areas effortlessly.

Enhance Functionality with Plugins

Plugins extend the functionality of your WordPress site.

SEO Plugins

Use plugins like Yoast SEO to optimize your site for search engines.

Security Plugins

Protect your site with tools like Wordfence or Sucuri.

Performance Plugins

Speed up your site with caching plugins like WP Rocket or W3 Total Cache.

Optimize Your Content Layout

Customizing content layout improves readability and engagement.

Add Custom Post Types

Use plugins like Custom Post Type UI to create custom post types for portfolios, testimonials, or products.

Use Grid Layouts

Create visually appealing layouts with grid plugins like Essential Grid.

Implement Advanced Custom Fields

Advanced Custom Fields (ACF) allows you to add customized fields to your posts and pages. This is especially useful for creating complex layouts or adding unique metadata.

Customize Your Menu

Menus play a vital role in navigation and user experience.

Create Custom Menus

Use the WordPress menu editor to organize your site’s navigation. Add custom links, categories, and pages.

Add Mega Menus

For complex websites, plugins like Max Mega Menu allow you to design large, multi-column menus.

Focus on Mobile Responsiveness

A responsive design ensures your site looks great on all devices.

Test Responsiveness

Use tools like Responsively to preview your site on various screen sizes.

Adjust with Media Queries

If you’re comfortable with CSS, use media queries to tweak styles for specific screen sizes.

@media (max-width: 768px) {  
    header {  
        font-size: 16px;  
    }  
}  

Optimize Website Performance

Customization should not come at the cost of performance.

Compress Images

Use plugins like Smush to compress images and improve load times.

Enable Caching

Caching plugins like WP Rocket store static versions of your site to speed up delivery.

Minify CSS and JavaScript

Minify files to reduce load times using plugins like Autoptimize.

Add Custom Widgets

Widgets allow you to display specific content in your site’s sidebar or footer.

Use Default Widgets

WordPress offers built-in widgets for categories, search bars, and recent posts.

Add Custom Widgets

Plugins like Widget Options help you create and manage custom widgets.

Personalize the Login Page

A branded login page enhances user experience for team members or clients.

Customize with Plugins

Plugins like Custom Login Page Customizer let you modify the login form and background.

Monitor Analytics

Tracking your site’s performance ensures your customizations align with user behavior.

Use Google Analytics

Install Google Analytics using the Site Kit by Google plugin.

Monitor User Engagement

Tools like Hotjar provide heatmaps and user behavior insights to refine your design.

Stay Updated with WordPress Trends

Keep up with trends and updates to ensure your site remains modern and functional.

Follow WordPress Blogs

Resources like the Official WordPress Blog share updates and best practices.

Join WordPress Communities

Forums and groups like WordPress Support offer advice and inspiration.

Conclusion

By following these WordPress customization tips, you can transform your site into a unique, user-friendly, and performance-optimized platform. From choosing the right theme to leveraging advanced plugins and tools, every step helps you align your site with your goals.

Whether you’re a beginner or a seasoned WordPress user, consistent updates, performance monitoring, and design improvements will ensure your website remains a valuable asset. Use these tips to customize your site the right way and achieve success online.

Published in News
on November 6, 2017

Completed a full set of template pages for Strategy Overview. Including several front-end templates for login, sign-up, register and password reset.

“A MSP (managed services provider) which will meet with clients every quarter/year to discuss strategic plans. This includes providing a quarterly business review (QBR) report, which until now, has been a time-consuming task for some of your most expensive stuff. Strategy Overview is designed to save your vCIOs and project engineers hours a month and systemizes your QBRS. You will generate beautiful PDF reports and budgets and take your vCIO process to the next level. The future of QBRs is here!”

Published in News
on July 6, 2017

Running on Smiles is a French blog dedicated to running. Its motto, “Go Outside. Run. Have Fun.” says it all. The site is trying to inspire and motivate people to be more active and show them that anyone can do it. The author Christina, a French/Bulgarian, is trying to show people that running can and should be fun and that there is a large community that is very supportive, and there are people ready to help you with your first steps.