Published in Web Development for Designers
on March 6, 2025

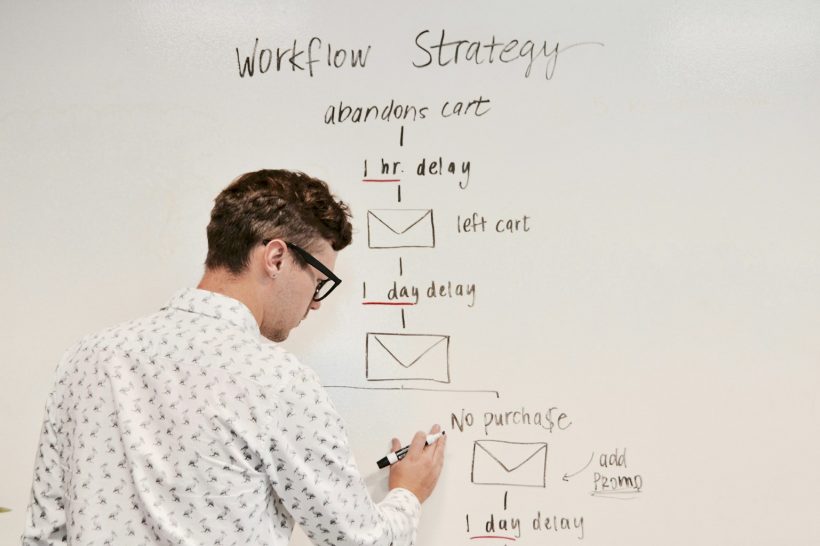
Creating a seamless design to deployment workflow is essential for efficient web development. A structured workflow bridges the gap between design and code, ensuring that projects progress smoothly from concept to launch. With the right tools, strategies, and collaboration techniques, teams can streamline their processes, reduce errors, and deliver high-quality websites efficiently.

This guide walks through each phase of the workflow, from design to deployment, providing actionable insights and best practices to optimize your project’s lifecycle.

Understanding the Design to Deployment Workflow

The design to deployment workflow encompasses all stages of a web development project, beginning with the initial design concept and ending with a live, fully functional website. This workflow includes:

  • Conceptualizing and designing the project.
  • Translating designs into code.
  • Testing for functionality, performance, and accessibility.
  • Deploying the website to a live server.

A clear and efficient workflow ensures that teams stay aligned, deadlines are met, and the final product meets client and user expectations.

Benefits of a Streamlined Workflow

Faster Development

A structured workflow eliminates redundant tasks, ensuring that the project moves swiftly from one stage to the next.

Improved Collaboration

Defined processes encourage better communication and collaboration between designers, developers, and stakeholders.

Reduced Errors

By addressing potential issues at each stage, teams can minimize bugs and inconsistencies in the final product.

Higher Quality

A well-defined workflow ensures that every detail is accounted for, resulting in a polished and professional website.

Stages of the Design to Deployment Workflow

Design Phase

The design phase involves creating wireframes, prototypes, and visual designs that define the website’s look and feel.

Key steps:

  • Wireframing: Outline the website’s structure and layout using tools like Figma or Sketch.
  • Prototyping: Build interactive prototypes to test usability and gather feedback.
  • Visual Design: Develop detailed mockups that include typography, colors, and imagery.

For best practices in design, refer to Adobe’s Design Guidelines.

Development Phase

During the development phase, designs are translated into code, ensuring that the website functions as intended.

Key steps:

  • HTML/CSS Structure: Build the website’s structure using semantic HTML and style it with CSS or preprocessors like Sass.
  • JavaScript Functionality: Add interactivity and dynamic features using JavaScript frameworks like React or Vue.js.
  • Component Libraries: Use design systems or component libraries like Bootstrap for faster development.

Testing Phase

The testing phase ensures that the website performs well across devices, browsers, and screen sizes.

Key steps:

  • Functional Testing: Verify that all features, such as forms and navigation, work as intended.
  • Performance Testing: Use tools like Google PageSpeed Insights to measure load times and optimize performance.
  • Cross-Browser Testing: Ensure compatibility with major browsers using platforms like BrowserStack.
  • Accessibility Testing: Check for compliance with accessibility standards, such as WCAG, to ensure inclusivity.

Deployment Phase

The deployment phase involves launching the website on a live server and ensuring its ongoing maintenance.

Key steps:

  • Version Control: Use Git repositories on platforms like GitHub to manage code and track changes.
  • Continuous Integration: Automate testing and deployments using CI/CD pipelines with tools like Jenkins or GitLab.
  • Hosting: Deploy the website to hosting platforms like Netlify or AWS.
  • Monitoring: Set up tools like Google Analytics to track performance and user behavior.

Tools to Enhance the Workflow

Project Management Tools

Platforms like Asana or Trello help teams track progress, assign tasks, and collaborate effectively.

Design Collaboration Tools

Tools like Zeplin and InVision streamline the handoff between designers and developers by providing detailed specifications.

Version Control Systems

Git enables teams to collaborate on code efficiently, ensuring that changes are tracked and conflicts are resolved easily.

Testing and Debugging Tools

Use Lighthouse for performance audits and WAVE for accessibility checks.

Deployment Platforms

Platforms like Vercel and Heroku simplify deployments with user-friendly interfaces and automation options.

Best Practices for an Efficient Workflow

Define Clear Roles

Establish clear responsibilities for each team member to prevent overlaps and ensure accountability.

Use a Mobile-First Approach

Design and develop for smaller screens first, then scale up for larger devices to ensure a responsive experience.

Maintain Consistent Documentation

Document design decisions, coding standards, and testing protocols to keep the team aligned.

Leverage Automation

Automate repetitive tasks like testing, builds, and deployments to save time and reduce human error.

Encourage Regular Feedback

Hold regular check-ins and feedback sessions to address issues early and keep the project on track.

Common Challenges and How to Overcome Them

Communication Barriers

Use communication tools like Slack or Microsoft Teams to keep everyone connected and informed.

Scope Creep

Define the project scope clearly at the beginning and use project management tools to track changes.

Lack of Testing

Incorporate automated and manual testing at every stage to identify and fix issues promptly.

Resource Constraints

Prioritize critical tasks and use pre-built components or frameworks to optimize resource allocation.

Real-Life Applications

E-commerce Websites

A retail company implemented a streamlined workflow to launch an online store within a tight deadline, leveraging automation tools and collaborative platforms.

Corporate Websites

A consulting firm adopted a mobile-first approach and component-based design system, ensuring scalability and responsiveness across their website.

SaaS Platforms

A SaaS provider used CI/CD pipelines to deploy updates efficiently, minimizing downtime and improving user satisfaction.

Monitoring and Improving the Workflow

Analyze Metrics

Track project timelines, task completion rates, and performance metrics to identify areas for improvement.

Conduct Post-Mortems

After each project, hold a post-mortem to discuss what went well and what could be improved in the workflow.

Stay Updated

Keep up with the latest tools and best practices in design and development to enhance your workflow continuously.

Conclusion

A well-defined design to deployment workflow is the backbone of successful web development projects. By following the strategies, tools, and best practices outlined in this guide, teams can deliver high-quality websites efficiently, meeting both client and user expectations.

For more insights, explore resources like Smashing Magazine’s Workflow Guides or tools like Zeplin. With the right workflow in place, your team can tackle even the most complex projects with confidence and precision.

Published in Web Development for Designers
on March 4, 2025

Collaboration between design and development teams is essential for delivering efficient, high-quality web projects. When designers and developers work seamlessly together, the result is not just faster workflows but also better user experiences. By mastering techniques to collaborate design development, teams can overcome communication gaps, reduce errors, and produce visually cohesive and functional websites.

This guide explores strategies, tools, and best practices for improving collaboration between design and development teams, leading to more productive projects and superior results.

The Importance of Collaboration in Design and Development

Streamlined Workflows

Collaboration ensures that both teams are aligned, reducing misunderstandings and unnecessary revisions. This streamlining accelerates the project timeline.

Enhanced Creativity

Open communication fosters creative problem-solving, allowing designers and developers to contribute unique insights and ideas.

Improved Quality

When teams work together, the end product is more likely to meet both design and technical standards, ensuring user satisfaction.

Reduced Costs

Efficient collaboration minimizes rework, saving time and resources, which is particularly beneficial for tight budgets.

For additional insights, visit Smashing Magazine’s collaboration tips.

Challenges in Design and Development Collaboration

Communication Gaps

Misunderstandings between designers and developers often arise due to differences in language, tools, and priorities.

Lack of Clear Roles

Unclear responsibilities can lead to overlaps or gaps in tasks, causing delays.

Tool Incompatibility

Using incompatible tools or software can hinder seamless collaboration, leading to inefficiencies.

Unrealistic Timelines

Unrealistic deadlines can create pressure, resulting in compromised quality or strained team dynamics.

Strategies to Enhance Collaboration

Establish Clear Goals

Define project objectives, deliverables, and milestones at the start. Ensure that both teams understand the end goals and their roles in achieving them.

Use a Centralized Platform

Leverage project management tools like Asana, Trello, or Jira to track progress, assign tasks, and maintain transparency.

Create a Shared Style Guide

Develop a comprehensive style guide outlining typography, colors, components, and interactions. This ensures consistency and clarity for both teams.

Adopt a Design System

Using design systems like Material Design or Bootstrap streamlines workflows by providing reusable components and guidelines.

Foster Open Communication

Encourage regular check-ins, feedback sessions, and open channels for questions and clarifications. Tools like Slack or Microsoft Teams can facilitate communication.

Tools for Collaboration

Figma

Figma allows real-time collaboration between designers and developers. Developers can inspect designs and export assets directly, reducing dependency on designers for updates.

Zeplin

Zeplin bridges the gap between design and development by providing detailed specifications, assets, and style guides.

Adobe XD

Adobe XD offers features like developer handoff, making it easy for developers to extract design elements and code snippets.

GitHub

GitHub supports version control and collaboration, enabling teams to work on the same codebase without conflicts.

Notion

Notion serves as a central hub for documentation, task tracking, and brainstorming, keeping teams aligned.

Bridging the Gap Between Designers and Developers

Align on Terminology

Ensure that both teams understand and agree on terms used in the project, such as components, layouts, and interactions.

Provide Developer-Friendly Designs

Designers should create developer-friendly designs by using grids, clear naming conventions, and consistent spacing.

Share Feedback Effectively

Offer constructive feedback that focuses on improving the design or functionality rather than critiquing the individual.

Test Prototypes Together

Both teams should participate in testing prototypes to identify potential issues early and refine the design accordingly.

Prioritize Accessibility

Ensure that designs and code adhere to accessibility standards, creating inclusive experiences for all users.

Benefits of Collaboration

Faster Time-to-Market

Effective collaboration reduces delays and ensures timely delivery, giving businesses a competitive edge.

Better Alignment

When both teams understand the project’s goals and requirements, the result is a cohesive product that meets user expectations.

Greater Job Satisfaction

Collaborative environments foster mutual respect and understanding, improving morale and satisfaction for both teams.

Scalable Solutions

Collaboration often leads to the creation of reusable components and processes, enabling scalability for future projects.

Best Practices for Collaboration

Involve Both Teams Early

Include designers and developers in initial discussions to align expectations and avoid surprises later.

Use Prototypes

Interactive prototypes provide a clear visual and functional reference, reducing ambiguity in implementation.

Encourage Continuous Learning

Provide opportunities for designers to learn coding basics and developers to understand design principles, fostering empathy and collaboration.

Regularly Review Progress

Schedule regular reviews to track progress, discuss challenges, and make adjustments as needed.

Celebrate Milestones

Acknowledge and celebrate team achievements to maintain motivation and a positive atmosphere.

Real-Life Applications

E-commerce Platforms

An online retailer streamlined collaboration by using Figma and Zeplin, ensuring accurate product page designs and faster development cycles.

Corporate Websites

A consulting firm adopted a shared design system, enabling designers and developers to reuse components and accelerate project delivery.

SaaS Applications

A SaaS company used GitHub and Jira to align teams on feature development, reducing bugs and improving user satisfaction.

Common Collaboration Mistakes and How to Avoid Them

Ignoring Developer Feedback

Designers should seek input from developers early to ensure designs are technically feasible.

Skipping Documentation

Always document decisions, processes, and guidelines to avoid confusion and miscommunication.

Overloading Tools

Using too many tools can create confusion. Select a few reliable tools that meet the team’s needs.

Neglecting User Needs

Focus on delivering user-centric designs and functionality rather than meeting internal preferences.

Monitoring and Refining Collaboration

Gather Feedback

Regularly collect feedback from team members to identify areas for improvement in collaboration processes.

Analyze Project Metrics

Track project timelines, task completion rates, and revision cycles to evaluate collaboration effectiveness.

Conduct Post-Mortems

After project completion, hold a post-mortem meeting to discuss what worked well and what could be improved.

Conclusion

Collaboration between design and development teams is essential for creating high-quality web projects efficiently. By implementing the strategies and tools outlined in this guide, teams can collaborate design development processes more effectively, achieving faster results and delivering superior user experiences.

For additional resources, explore InVision’s Collaboration Guide. With the right approach, communication, and tools, seamless collaboration can transform your workflows and elevate your projects.

Published in Web Development for Designers
on February 27, 2025

Style guides play a pivotal role in ensuring consistency and efficiency in web development projects. They act as a blueprint, aligning designers, developers, and stakeholders with a unified vision. A well-crafted style guide for web projects defines the rules and standards for visual and functional elements, enabling teams to deliver cohesive and professional websites.

This guide explores the significance of style guides, how to create them, and the best practices for integrating them into your workflow to achieve outstanding results.

What Are Style Guides for Web Projects?

A style guide is a document or resource that outlines the design and coding standards for a web project. It includes rules for typography, colors, spacing, imagery, components, and interactions, ensuring a unified look and feel throughout the website.

Style guides can take various forms, from static documents to dynamic, interactive libraries accessible through tools like Figma, Sketch, or online platforms.

For inspiration, explore examples on Styleguides.io.

Why Style Guides Matter in Web Projects

Consistency Across Designs

Style guides ensure that all pages and components of a website follow the same visual and functional principles, avoiding discrepancies.

Improved Team Collaboration

With a central reference, designers and developers can work in sync, reducing miscommunications and speeding up workflows.

Faster Development

Reusing predefined styles and components reduces the need to start from scratch, accelerating the development process.

Enhanced User Experience

Consistency in design leads to familiarity, making navigation and interaction intuitive for users.

Scalability

A well-maintained style guide allows for seamless updates and expansions, ensuring that new additions align with the original design principles.

Key Components of a Web Style Guide

Typography

Define rules for fonts, sizes, line heights, and weights to ensure text is readable and aesthetically pleasing.

Example:

:root {  
  --font-primary: 'Roboto', sans-serif;  
  --font-size-base: 16px;  
  --line-height-base: 1.5;  
}  

Colors

List the primary, secondary, and neutral colors used in the project, along with their hex or RGB values.

Example:

$primary-color: #3498db;  
$secondary-color: #2ecc71;  
$neutral-color: #f5f5f5;  

Spacing

Specify rules for padding, margins, and grid layouts to maintain uniformity across elements.

Example:

.spacing {  
  margin: 16px;  
  padding: 8px;  
}  

Components

Document reusable components such as buttons, cards, forms, and navigation menus, along with their states (hover, focus, active).

Imagery and Icons

Provide guidelines for image dimensions, formats, and placement, as well as rules for iconography.

Accessibility Standards

Include accessibility principles, such as color contrast ratios, keyboard navigation, and screen reader compatibility, ensuring inclusivity.

Creating a Style Guide for Your Web Project

Audit Existing Assets

Review the current designs and components to identify patterns, inconsistencies, and areas requiring standardization.

Choose a Tool

Decide on a platform to host your style guide. Tools like Figma, Zeroheight, or static documentation sites work well for collaborative projects.

Define Core Elements

Start by documenting typography, colors, and spacing, as these are the foundation of any design system.

Build Component Libraries

Develop a library of reusable components, documenting their structure, usage, and variations.

Incorporate Code Snippets

Provide CSS or JavaScript snippets alongside design guidelines to streamline implementation for developers.

Include Examples

Add real-world examples of how styles and components should be used to clarify their purpose.

Best Practices for Style Guides

Keep It Up to Date

Regularly update your style guide to reflect changes in design trends, branding, or project requirements.

Make It Accessible

Ensure all team members can easily access and contribute to the style guide, promoting collaboration and consistency.

Focus on Reusability

Design components that can be reused across multiple pages and projects, reducing redundancy.

Emphasize Documentation

Provide clear and detailed documentation for each style and component, leaving no room for ambiguity.

Test for Accessibility

Ensure your style guide adheres to accessibility standards, such as WCAG, to create inclusive designs.

Benefits of Using Style Guides

Reduced Errors

Style guides minimize errors by providing a clear reference for design and development decisions.

Better Branding

By standardizing visual elements, style guides reinforce brand identity across all digital platforms.

Faster Onboarding

New team members can quickly understand the project’s design and coding standards, reducing onboarding time.

Cost Efficiency

Reusing components and adhering to standardized practices saves time and resources during development.

Challenges of Implementing Style Guides

Initial Investment

Creating a comprehensive style guide requires time and effort upfront, which may seem daunting for small teams.

Maintaining Consistency

As projects evolve, keeping the style guide updated and ensuring adherence can be challenging.

Balancing Flexibility and Rules

Overly rigid guidelines may stifle creativity, while overly flexible ones can lead to inconsistencies.

Real-Life Applications

E-commerce Websites

A retail website used a style guide to standardize product pages, ensuring consistent typography, colors, and button styles across categories.

Corporate Portals

A consulting firm created a style guide to maintain branding consistency across its website and client-facing materials.

Blogging Platforms

A blog implemented a style guide for reusable components like author profiles, post layouts, and category labels, enhancing scalability.

Tools for Building and Managing Style Guides

Pattern Lab

Pattern Lab helps create dynamic, interactive style guides using atomic design principles.

Storybook

Storybook is a popular tool for documenting UI components in React, Vue, or Angular projects.

Zeroheight

Zeroheight integrates with design tools like Figma to create collaborative style guides.

Frontify

Frontify is a cloud-based platform for managing branding and style guides.

Monitoring and Refining Style Guides

Conduct Regular Audits

Periodically review your style guide to identify outdated components or inconsistencies.

Gather Feedback

Collect input from designers, developers, and stakeholders to improve the guide’s usability and relevance.

Use Analytics

Track how often components or guidelines are used to identify gaps or redundant elements.

Conclusion

Style guides are indispensable for maintaining consistency, efficiency, and collaboration in web projects. By creating and adhering to a style guide for web projects, teams can produce visually cohesive, scalable, and user-friendly websites that align with brand identity and user expectations.

For additional resources, explore Google’s Material Design Guidelines or tools like Pattern Lab. With a well-structured style guide, your web projects will not only meet but exceed design and development goals.

Published in Web Development for Designers
on January 14, 2025

Effective collaboration between designers and developers is key to delivering successful projects. However, these two roles often approach tasks with different perspectives, which can lead to misunderstandings or inefficiencies. By implementing the right communication tips for designers, teams can bridge this gap, ensuring smooth workflows and high-quality results.

This guide explores strategies for designers to communicate effectively with developers, fostering collaboration and mutual understanding.

Understanding the Designer-Developer Dynamic

Designers and developers bring unique skills and mindsets to a project.

  • Designers: Focus on aesthetics, user experience, and the creative aspects of the project.
  • Developers: Concentrate on functionality, technical feasibility, and efficient coding practices.

These differing priorities can create friction if communication is unclear. By recognizing each other’s strengths and challenges, teams can work harmoniously toward shared goals.

Start with a Shared Vision

A project’s success begins with aligning on a clear and shared vision.

Involve Developers Early

Engage developers during the design phase to gather feedback on feasibility. Developers can provide insights into technical limitations and suggest alternatives for complex features.

Clarify Project Goals

Ensure everyone understands the project’s objectives, target audience, and key deliverables. Use tools like Miro for collaborative brainstorming sessions.

Use Clear and Concise Documentation

Documentation serves as the foundation for effective communication in web projects.

Create Design Specifications

Provide detailed design specs that include:

  • Spacing and alignment guides.
  • Font styles and sizes.
  • Color codes and gradients.

Tools like Zeplin simplify the handoff process by generating specs directly from design files.

Maintain a Style Guide

Develop a style guide that outlines reusable components and design standards. This ensures consistency and helps developers understand the design system.

Leverage Collaboration Tools

Collaboration tools bridge the communication gap between designers and developers.

Use Design Handoff Tools

Platforms like Figma or Adobe XD allow developers to inspect layers, download assets, and access CSS code snippets directly from the design file.

Centralize Communication

Keep discussions organized by using project management tools like Asana or communication platforms like Slack. Create dedicated channels for design-developer discussions to streamline communication.

Foster an Open Feedback Loop

Feedback is essential for refining and improving the project.

Encourage Regular Check-Ins

Schedule regular meetings to discuss progress, address concerns, and align on next steps. Use these sessions to resolve misunderstandings early.

Give Constructive Feedback

When providing feedback, be specific and solution-oriented. For example, instead of saying, “This looks off,” say, “The padding here should match the spacing in the header.”

Speak a Common Language

A shared vocabulary reduces miscommunication and aligns designers and developers on technical terms.

Learn Basic Development Concepts

Designers don’t need to code, but understanding basic concepts like responsive design, CSS grids, and browser compatibility helps when discussing implementation with developers.

Simplify Design Jargon

Avoid using overly technical design terms that developers may not be familiar with. Instead, explain concepts in a way that highlights their impact on user experience.

Adapt Designs for Feasibility

Designers can improve collaboration by creating designs that are easy to implement.

Design with Constraints in Mind

Understand the limitations of the platform or framework being used. For example, a WordPress project may have constraints that influence layout or functionality.

Provide Alternatives

Offer flexible design options for elements that may be difficult to code. This gives developers room to adapt without compromising the design’s integrity.

Be Mindful of Deadlines

Clear communication around timelines ensures that both designers and developers can meet deadlines without compromising quality.

Break Tasks into Phases

Divide the project into smaller milestones with realistic timelines. This approach allows teams to focus on achievable goals and avoid last-minute stress.

Set Clear Priorities

Communicate which design elements are must-haves and which can be deprioritized if time becomes a constraint.

Test Designs Together

Collaboration doesn’t end once the design is handed off. Testing ensures that the final product aligns with the original vision.

Conduct Joint QA Sessions

Involve designers during quality assurance testing to verify that the implementation matches the design mockups. Tools like PerfectPixel help compare designs to live websites.

Test Across Devices

Ensure the design looks consistent across different devices and browsers. Use platforms like BrowserStack for cross-browser testing.

Build a Culture of Collaboration

Strong communication goes beyond tools and processes—it’s about fostering a collaborative team environment.

Respect Each Other’s Expertise

Acknowledge the unique skills that designers and developers bring to the table. Encourage mutual respect and a willingness to learn from each other.

Celebrate Successes

Recognize and celebrate milestones, whether it’s completing a challenging feature or delivering a project on time. Positive reinforcement builds camaraderie and strengthens collaboration.

Overcoming Common Communication Challenges

Challenges will arise in any project. Here’s how to address some of the most common issues:

Misaligned Expectations

Solution: Regularly revisit project goals and check for alignment. Use visual tools like Gantt charts to track progress.

Ambiguous Feedback

Solution: Use visual annotations or tools like Markup.io to clarify feedback directly on design files.

Lack of Technical Understanding

Solution: Schedule knowledge-sharing sessions where developers explain technical concepts to designers, and vice versa.

The Role of Technology in Improving Communication

Emerging technologies are making it easier for designers and developers to collaborate effectively.

Real-Time Collaboration

Tools like Figma enable designers and developers to work simultaneously on the same file, reducing delays and improving transparency.

Automated Workflows

CI/CD pipelines can automate parts of the development process, ensuring that design updates are quickly reflected in the implementation. Explore tools like Jenkins for automation.

Conclusion

Effective collaboration between designers and developers hinges on clear communication, mutual respect, and the right tools. By following these communication tips for designers, teams can bridge the gap between creativity and technical execution, resulting in seamless workflows and high-quality outcomes.

Whether you’re using tools like Figma for design handoffs or fostering open feedback loops, prioritizing communication ensures that projects are completed efficiently and to the satisfaction of all stakeholders. Embrace these strategies to create a collaborative environment where both designers and developers thrive.

Published in Web Development for Designers
on December 10, 2024

Converting a PSD (Photoshop Design) file into HTML is a critical step in web development. Proper preparation of your PSD file ensures the HTML coding process is smooth, efficient, and accurate. Whether you’re a designer handing off your work or a developer looking to streamline the process, knowing how to prepare PSD for HTML is essential. In this guide, we’ll explore the best practices and steps you can follow for a seamless PSD-to-HTML conversion.

Why Preparing PSD for HTML is Important

Properly preparing your PSD files minimizes errors and confusion during the HTML coding phase. It ensures the design elements are clearly defined, organized, and ready for implementation. Poorly prepared files can lead to misaligned layouts, inconsistent styles, and a longer development process. By following these steps, you can save time, improve communication between teams, and deliver a polished final product.

For further insights into why preparation matters, visit Smashing Magazine for design-to-code best practices.

Organizing Layers in Your PSD File

Use a Clear Layer Structure

A clean and well-organized layer structure is the foundation of an efficient PSD-to-HTML workflow. Group related elements, such as headers, footers, and navigation menus, into named folders. This structure allows developers to easily locate and work with the elements they need.

For example:

  • Header
    • Logo
    • Navigation
  • Main Content
    • Hero Section
    • Call-to-Action

Name Layers Descriptively

Avoid generic names like “Layer 1” or “Copy 2.” Instead, use descriptive names such as “Hero Background” or “Button Primary.” Descriptive naming helps developers quickly identify elements and speeds up the conversion process.

Delete Unused Layers

Remove any unused or hidden layers from the PSD file. These layers can clutter the file and cause confusion during the coding process. Always ensure the file contains only the elements needed for the final design.

Ensuring Consistency in Design Elements

Use a Grid System

A grid system ensures consistency in spacing, alignment, and proportions. It provides a clear reference for developers to replicate the layout accurately in HTML. Grids also improve responsiveness, making your design adaptable to various screen sizes.

Standardize Typography

Define font styles, sizes, and line heights consistently throughout your design. Use paragraph and character styles in Photoshop to apply consistent typography. Clearly label font families and weights so developers can match them during HTML coding.

Optimize Colors and Assets

Use a limited and consistent color palette to maintain visual harmony. Label colors clearly and include their hexadecimal values in the PSD file for easy reference. Similarly, prepare optimized assets such as icons and images at their intended sizes to reduce loading times.

For more design tips, check out Creative Bloq for resources on design consistency.

Preparing Assets for Development

Export Images Properly

Before starting the HTML conversion, ensure all images are exported in appropriate formats. Use PNG for transparent images and JPEG for photographs. Compress images without losing quality to improve website performance. Tools like TinyPNG can help optimize image sizes.

Slice the Design

Slicing involves dividing your PSD into smaller sections to extract individual design elements, such as buttons, banners, or background images. While modern tools like Figma and Adobe XD have reduced the need for manual slicing, it can still be useful for certain workflows.

Organize Asset Folders

Create a folder structure for your exported assets. Common folders include:

  • Images
  • Icons
  • Fonts
  • CSS

This organization helps developers quickly find and use the assets during the coding process.

Ensuring Design Responsiveness

Prepare for Multiple Screen Sizes

Ensure your PSD is designed with responsiveness in mind. Create additional versions of your design for different screen sizes, such as desktop, tablet, and mobile. This allows developers to implement media queries during HTML coding for a seamless responsive experience.

Define Breakpoints

Clearly specify breakpoints in your design to guide developers on how the layout should adjust for different screen sizes. Common breakpoints include:

  • Desktop: 1200px and above
  • Tablet: 768px to 1024px
  • Mobile: 480px to 767px

Responsive design is a crucial aspect of modern web development. For more guidance, visit CSS-Tricks for responsive web design tips.

Communication Between Designers and Developers

Provide a Style Guide

A style guide is a document that outlines design specifications, such as font sizes, colors, and spacing. This guide ensures developers have all the information they need to accurately translate the design into HTML. Tools like Zeplin or Figma make it easy to share style guides and specifications.

Include Annotations

Annotate your PSD file with comments to clarify complex elements or functionality. For example, if a button has hover effects or animations, add a note to explain the behavior. This reduces back-and-forth communication and speeds up the development process.

Share Supporting Files

In addition to the PSD file, provide developers with any supporting files they might need, such as fonts or external libraries. This ensures the final output matches the original design.

Testing and Finalizing the PSD File

Review for Errors

Before handing off your PSD file, review it for errors or inconsistencies. Double-check the alignment, spacing, and placement of elements. Ensure all assets are properly labeled and ready for use.

Validate Accessibility

Incorporate accessibility features into your design. For example, ensure text has sufficient contrast against backgrounds and use labels for form elements. Accessibility improves usability for all users and is an essential consideration for modern websites.

For more on accessibility standards, refer to the Web Content Accessibility Guidelines (WCAG).

Get Developer Feedback

Share the PSD file with your developer before finalizing it. They can provide valuable feedback on whether the file is ready for HTML conversion or if additional adjustments are needed.

Tools to Simplify PSD to HTML Workflow

Several tools can streamline the PSD-to-HTML process. Some popular options include:

  • Adobe XD: An all-in-one tool for design and prototyping.
  • Zeplin: Facilitates collaboration between designers and developers.
  • Avocode: A tool for inspecting and exporting assets from PSD files.
  • Photoshop Generator: Automatically exports assets from Photoshop layers.

These tools bridge the gap between design and development, ensuring a smoother workflow.

Conclusion

Preparing your PSD file for HTML conversion is a critical step in delivering a successful web development project. By organizing layers, standardizing design elements, and collaborating effectively with developers, you can ensure the transition from design to code is seamless.

Follow these tips and best practices to prepare PSD for HTML with confidence. A well-prepared file not only saves time but also ensures the final website is true to the original design. For additional resources on design-to-code workflows, explore Toptal for expert advice.

A meticulous approach to PSD preparation is the foundation for successful web development. Start implementing these practices today, and watch your projects achieve new levels of efficiency and quality.

Published in Web Development for Designers
on November 14, 2024

Creating a successful website or application requires input from both designers and developers. While designers focus on aesthetics and user experience, developers bring those designs to life with code. Bridging the gap between these two disciplines is crucial for seamless collaboration and efficient project delivery. Learning how to effectively bridge designers and developers can transform workflows, enhance communication, and result in high-quality outcomes.

This guide explores strategies, tools, and best practices to foster better collaboration between design and development teams.

Why Bridging Designers and Developers Is Important

The relationship between designers and developers is the backbone of any digital project. Misalignment can lead to delays, increased costs, and compromised quality.

  • Enhance Productivity: Better collaboration reduces misunderstandings and ensures smooth workflows.
  • Improve Project Outcomes: Unified efforts result in designs that are both visually appealing and technically feasible.
  • Foster Innovation: Collaborative teams are more likely to brainstorm creative solutions to complex problems.

Challenges in Bridging Designers and Developers

Designers and developers often face challenges that hinder effective collaboration.

Communication Gaps

Designers and developers use different terminologies, leading to potential miscommunication. For example, a designer might prioritize aesthetics, while a developer focuses on functionality.

Misaligned Expectations

Without clear communication, developers may misinterpret design intentions, and designers may overlook technical limitations.

Lack of Shared Tools

Using separate tools for design and development can create inefficiencies, as it requires constant back-and-forth and manual adjustments.

Strategies to Bridge Designers and Developers

Fostering collaboration between designers and developers involves clear communication, shared tools, and aligned goals.

Establish Clear Communication Channels

Effective communication is essential for bridging the gap between design and development teams.

  • Centralize Communication: Use tools like Slack or Microsoft Teams to create dedicated channels for discussions.
  • Schedule Regular Check-Ins: Hold frequent meetings to align goals, address concerns, and review progress.
  • Create Shared Terminology: Develop a glossary of terms to ensure everyone understands key concepts.

Use Collaborative Tools

Investing in collaborative tools helps streamline workflows and enhances transparency.

  • Figma: A cloud-based design tool that allows developers to inspect designs, view CSS properties, and export assets. Explore Figma.
  • Zeplin: Provides a bridge between design and development by translating designs into code-ready specs. Learn more at Zeplin.
  • InVision: Enables designers and developers to share prototypes, leave comments, and iterate collaboratively. Visit InVision.

Involve Developers Early

Incorporating developers in the design phase ensures feasibility and minimizes rework.

  • Design Feasibility Reviews: Developers can provide input on technical limitations and suggest alternatives.
  • Collaborative Brainstorming: Include developers in design discussions to bring fresh perspectives.

Build a Design System

A design system provides a set of reusable components and guidelines for both designers and developers, ensuring consistency.

  • Centralized Components: Store UI elements, such as buttons and forms, in a shared library.
  • Documentation: Provide clear instructions for using components, including design specifications and code snippets.
  • Tools: Use platforms like Storybook to create and share design systems.

Best Practices to Align Designers and Developers

Following best practices can improve alignment and foster a culture of collaboration.

Define Project Goals Together

Start each project by discussing objectives, target audiences, and desired outcomes with both teams. This ensures everyone is working toward the same vision.

Share Design Files Early

Providing developers with access to design files early in the process allows them to identify potential challenges and plan accordingly.

Use Responsive Design Principles

Designers should create responsive layouts that developers can easily translate into code. Platforms like Bootstrap provide a solid foundation for responsive designs.

Create Prototypes

Interactive prototypes help developers understand the intended user flow and interactions. Tools like Adobe XD are ideal for creating clickable prototypes.

Tools to Bridge Designers and Developers

Leveraging the right tools can significantly improve collaboration.

Abstract

Abstract acts as a version control system for design files, similar to Git for code.

  • Features:
    • Version tracking for designs.
    • Branching and merging for iterative improvements.
    • Integration with popular design tools like Sketch.

Visit Abstract.

GitHub

GitHub facilitates collaboration by enabling teams to manage and track changes in code.

  • Features:
    • Version control for codebases.
    • Collaborative workflows with pull requests and code reviews.
    • Integration with design tools through plugins.

Explore GitHub.

Avocode

Avocode simplifies the handoff process by bridging the gap between design and code.

  • Features:
    • Export assets directly from design files.
    • Generate CSS, HTML, and Swift code snippets.
    • Support for multiple design tools, including Sketch and Adobe XD.

Learn more at Avocode.

Benefits of Bridging Designers and Developers

Successfully bridging designers and developers leads to significant benefits for teams and projects.

Faster Turnaround Times

Collaborative workflows reduce delays caused by miscommunication and rework, enabling faster project delivery.

Higher Quality Outputs

Aligning design and development ensures that the final product matches the intended vision, resulting in superior quality.

Stronger Team Dynamics

Improved collaboration fosters mutual respect and understanding between designers and developers, creating a positive work environment.

Increased Innovation

Cross-functional collaboration encourages creativity and problem-solving, leading to innovative solutions.

Challenges in Bridging Teams

While collaboration has many benefits, challenges can arise.

Resistance to Change

Team members may be reluctant to adopt new workflows or tools. Address this by providing training and emphasizing the benefits of collaboration.

Misaligned Priorities

Designers and developers may prioritize different aspects of a project. Facilitate discussions to align goals and expectations.

Tool Overload

Using too many tools can overwhelm teams and hinder productivity. Choose a select few that address the most critical collaboration needs.

Conclusion

To bridge designers and developers, teams must prioritize communication, adopt collaborative tools, and align their workflows. By fostering better collaboration, businesses can ensure seamless project execution, delivering visually appealing and technically robust digital products.

Invest in tools like Figma, Zeplin, and GitHub, and focus on building a design system to streamline processes. With the right strategies and tools, your team can overcome challenges and achieve greater success in web design and development projects.