Published in Pixel-Perfect Design
on April 8, 2025

CSS Grid is a powerful layout system that revolutionizes web design by providing a structured and flexible way to arrange elements on a web page. With its ability to create grid-based designs efficiently, CSS Grid helps developers craft perfect layouts with precision and control. Whether designing responsive websites or aligning complex components, mastering CSS Grid ensures seamless and professional results.

This guide dives into the fundamentals, advanced techniques, and best practices for using CSS Grid to build perfect layouts.

What Is CSS Grid?

CSS Grid is a layout system in CSS that allows developers to define rows and columns, organizing content in a two-dimensional grid. Unlike older layout methods like floats or flexbox, CSS Grid simplifies the process of aligning elements both horizontally and vertically.

For an introduction, explore the MDN Web Docs on CSS Grid.

Benefits of CSS Grid for Layouts

Two-Dimensional Control

CSS Grid handles both rows and columns, offering complete control over layout structure.

Simplified Responsiveness

With CSS Grid, creating responsive designs is straightforward using grid properties and media queries.

Precise Alignment

Grid areas, lines, and tracks ensure precise placement of elements, achieving a polished look.

Flexibility and Customization

CSS Grid adapts to various content types, making it ideal for everything from simple layouts to intricate designs.

Key Concepts in CSS Grid

Grid Container

The parent element that defines the grid layout.

Example:

.container {  
  display: grid;  
  grid-template-columns: repeat(3, 1fr);  
  grid-gap: 16px;  
}  

Grid Items

The child elements within a grid container. Each grid item is placed in cells defined by the grid.

Example:

<div class="container">  
  <div class="item">1</div>  
  <div class="item">2</div>  
  <div class="item">3</div>  
</div>  

Grid Tracks

The rows and columns that make up the grid.

Grid Lines

The dividing lines between rows and columns. Grid lines are numbered for easy placement.

Grid Areas

Named sections of the grid for organizing content.

Example:

.container {  
  display: grid;  
  grid-template-areas:  
    "header header header"  
    "sidebar content content"  
    "footer footer footer";  
}  

.header { grid-area: header; }  
.sidebar { grid-area: sidebar; }  
.content { grid-area: content; }  
.footer { grid-area: footer; }  

Steps to Create Perfect Layouts with CSS Grid

Define the Grid

Use the grid-template-columns and grid-template-rows properties to define the number and size of grid tracks.

Example:

.container {  
  display: grid;  
  grid-template-columns: 1fr 2fr;  
  grid-template-rows: auto;  
}  

Position Grid Items

Place grid items using the grid-column and grid-row properties to specify their starting and ending points.

Example:

.item {  
  grid-column: 1 / 3;  
  grid-row: 1 / 2;  
}  

Add Gaps

Create space between grid items using the grid-gap property.

Example:

.container {  
  grid-gap: 20px;  
}  

Use Responsive Design

Combine CSS Grid with media queries to adapt layouts for different screen sizes.

Example:

@media (max-width: 768px) {  
  .container {  
    grid-template-columns: 1fr;  
  }  
}  

Advanced Techniques for CSS Grid

Fractional Units

Use the fr unit to divide space proportionally.

Example:

.container {  
  grid-template-columns: 2fr 1fr;  
}  

Minmax Function

Define flexible grid tracks with a minimum and maximum size.

Example:

.container {  
  grid-template-columns: repeat(3, minmax(100px, 1fr));  
}  

Auto Placement

Let CSS Grid automatically place items with the grid-auto-rows or grid-auto-flow properties.

Example:

.container {  
  grid-auto-rows: min-content;  
}  

Nested Grids

Combine multiple grids by nesting grid containers within each other.

Example:

.nested-container {  
  display: grid;  
  grid-template-columns: repeat(2, 1fr);  
}  

Tools to Master CSS Grid

Grid Generator

CSS Grid Generator is an interactive tool for building grid layouts.

Grid Inspector

Use browser developer tools like Firefox Grid Inspector to visualize and debug grids.

CSS Tricks Guide

CSS Tricks provides a comprehensive guide to CSS Grid with examples.

Best Practices for CSS Grid Layouts

Plan Your Layout

Sketch your layout or create a wireframe to define grid areas and item placements.

Combine Grid with Flexbox

Use CSS Grid for large-scale layouts and flexbox for detailed alignment within grid items.

Test for Accessibility

Ensure grid layouts are accessible by using semantic HTML and following ARIA guidelines.

Optimize for Performance

Minimize CSS complexity by using reusable classes and avoiding over-nesting.

Validate Cross-Browser Compatibility

Test your grid layouts on multiple browsers to ensure consistency.

Common Mistakes and How to Avoid Them

Overcomplicating the Grid

Keep grid definitions simple and avoid unnecessary complexity that can hinder readability.

Ignoring Responsiveness

Always test layouts on various screen sizes and devices to maintain usability.

Skipping Browser Testing

Validate grid functionality on browsers like Chrome, Firefox, Safari, and Edge to catch inconsistencies.

Real-Life Applications of CSS Grid

E-commerce Websites

An online store used CSS Grid to create responsive product grids, enhancing the browsing experience for users on all devices.

Blogs and Portfolios

A blogging platform adopted CSS Grid to organize posts and images into visually appealing layouts.

Corporate Websites

A consulting firm utilized CSS Grid to align content and create a professional and polished homepage.

Monitoring and Refining Grid Layouts

Analyze User Feedback

Gather insights from users about layout usability and aesthetics.

Perform Regular Audits

Audit your CSS code for efficiency and eliminate unused or redundant styles.

Use Analytics

Evaluate bounce rates and engagement metrics to measure the impact of your grid layouts.

Conclusion

Mastering CSS Grid perfect layouts enables developers to create seamless, responsive, and visually striking designs. By following the techniques and best practices outlined in this guide, you can build layouts that enhance user experience and meet modern web design standards.

For additional resources, explore tools like CSS Grid Generator or refer to guides on MDN Web Docs. With CSS Grid, achieving pixel-perfect layouts has never been more efficient or accessible.

Published in Pixel-Perfect Design
on April 3, 2025

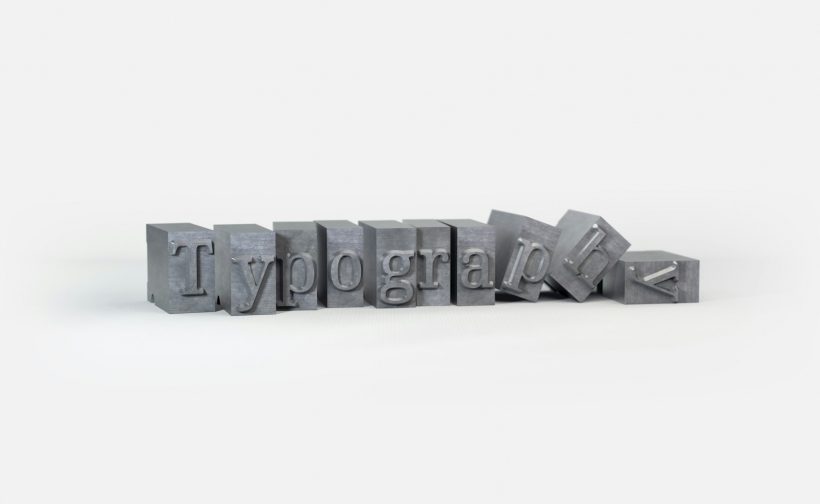
Typography plays a critical role in web design, influencing readability, user engagement, and overall aesthetics. Achieving typography for pixel-perfect websites requires attention to detail and the implementation of strategies that enhance both visual appeal and functionality. Pixel-perfect typography ensures text elements align seamlessly with other design elements, providing a polished and professional look.

This guide dives into expert tips, best practices, and tools for mastering typography in web design, ensuring your websites deliver exceptional user experiences.

The Importance of Typography in Web Design

Enhances Readability

Well-designed typography ensures that text is easy to read on all devices, reducing eye strain and encouraging users to engage with the content.

Establishes Visual Hierarchy

Typography helps organize content by emphasizing important elements such as headings, subheadings, and calls-to-action.

Strengthens Branding

Consistent typography reinforces a brand’s identity by aligning with its tone and style.

Improves Accessibility

Inclusive typography ensures that text is readable by users with visual impairments or cognitive challenges.

For more insights into typography’s impact, explore Adobe’s Typography Tips.

Key Elements of Typography for Pixel-Perfect Websites

Font Selection

Choose fonts that align with the brand’s identity and are legible across various screen sizes.

Popular web-safe fonts include:

  • Arial
  • Georgia
  • Roboto
  • Open Sans

Font Pairing

Combine fonts to create contrast while maintaining harmony. Pairing a serif font with a sans-serif font is a common practice.

Example:

  • Headings: Merriweather (Serif)
  • Body Text: Lato (Sans-serif)

Font Size

Use a responsive typography scale to ensure consistent text sizing across devices.

Example:

h1 { font-size: 2.5rem; }  
p { font-size: 1rem; }  

Line Height and Spacing

Adjust line height to ensure adequate spacing between lines, improving readability.

Example:

body {  
  font-family: 'Open Sans', sans-serif;  
  line-height: 1.6;  
}  

Color and Contrast

Select colors with sufficient contrast to ensure readability, especially for users with visual impairments. Tools like Contrast Checker can help test color combinations.

Tips for Pixel-Perfect Typography

Use a Grid System

Align text elements with a grid to ensure consistent spacing and alignment across the layout.

Example:

.container {  
  display: grid;  
  grid-template-columns: repeat(12, 1fr);  
  gap: 16px;  
}  

Leverage CSS Variables

Use CSS variables to define typography settings, enabling consistent styling and easier updates.

Example:

:root {  
  --font-primary: 'Roboto', sans-serif;  
  --font-size-base: 16px;  
  --line-height-base: 1.5;  
}  

body {  
  font-family: var(--font-primary);  
  font-size: var(--font-size-base);  
  line-height: var(--line-height-base);  
}  

Optimize for Mobile

Ensure text is responsive and legible on smaller screens by using media queries.

Example:

@media (max-width: 768px) {  
  body { font-size: 14px; }  
}  

Test Across Devices

Validate your typography on multiple devices and browsers to ensure consistent performance. Tools like BrowserStack can assist with testing.

Incorporate Web Fonts

Use web fonts to expand typography options while maintaining performance. Google Fonts is a popular choice for free web fonts.

Example of embedding a Google Font:

<link href="https://fonts.googleapis.com/css2?family=Roboto:wght@400;700&display=swap" rel="stylesheet">  

Tools for Achieving Pixel-Perfect Typography

Figma

Figma allows designers to create and refine typography systems with precision.

Adobe XD

Adobe XD provides tools for designing, testing, and validating typography in web projects.

Google Fonts

Google Fonts offers a wide selection of free web fonts optimized for performance and usability.

Typography.js

Typography.js helps developers create typographic themes and scales programmatically.

WebAIM Contrast Checker

WebAIM Contrast Checker ensures your typography meets accessibility standards.

Common Mistakes and How to Avoid Them

Overusing Font Styles

Using too many fonts or weights can create a cluttered and inconsistent design. Stick to a maximum of two to three typefaces.

Ignoring Line Length

Lines that are too long or too short can hinder readability. Aim for line lengths of 50–75 characters for optimal readability.

Neglecting Accessibility

Failing to consider accessibility can exclude users. Ensure fonts are legible and colors meet contrast standards.

Overlooking Performance

Large font files can slow down your site. Use font subsets or preload key fonts to improve loading times.

Example of preloading a font:

<link rel="preload" href="/fonts/roboto-regular.woff2" as="font" type="font/woff2" crossorigin="anonymous">  

Real-Life Applications of Pixel-Perfect Typography

E-commerce Websites

An online retailer used pixel-perfect typography to improve product descriptions’ readability, leading to higher conversions.

Corporate Websites

A consulting firm adopted a consistent typography system to align their branding across global sites.

Blogging Platforms

A blogger enhanced user engagement by refining typography, making articles easier to read and visually appealing.

Monitoring Typography Effectiveness

User Feedback

Gather feedback from users about readability and overall design quality.

Analytics

Monitor bounce rates and session durations using Google Analytics to measure the impact of typography on user engagement.

Regular Audits

Perform typography audits regularly to ensure consistency and alignment with brand standards.

Conclusion

Achieving typography for pixel-perfect websites requires a combination of design principles, technical implementation, and continuous refinement. By following the tips and tools outlined in this guide, you can create web typography that enhances readability, reinforces branding, and delivers exceptional user experiences.

For further inspiration, explore resources like Google Fonts or tools like Typography.js. With well-executed typography, your websites can leave a lasting impression and keep users engaged.

Published in Pixel-Perfect Design
on April 1, 2025

In web design and development, ensuring the accuracy of design implementation is critical to delivering high-quality projects that meet client expectations and provide a seamless user experience. When you validate work design specs, you bridge the gap between design and development, ensuring that every element aligns perfectly with the original vision.

This guide explores the importance of validating design specs, the tools and techniques to streamline the process, and best practices for achieving pixel-perfect results.

What Does Validating Design Specs Mean?

Validating design specs involves comparing a website’s live implementation to the original design mockups or prototypes. It ensures that:

  • Fonts, colors, and spacing match the provided specifications.
  • Layouts and interactions are implemented as intended.
  • The website is consistent across different browsers and devices.

For example, a designer might specify a 16px font size for body text and a 24px padding for a button. Validation checks whether these specifications are followed in the live site.

Why Validate Work Design Specs?

Ensures Design Consistency

Validation prevents discrepancies between design mockups and the final product, ensuring a cohesive and polished user experience.

Improves Client Satisfaction

Clients expect their designs to be executed accurately. Proper validation demonstrates professionalism and attention to detail.

Reduces Errors

By catching deviations early, validation minimizes costly revisions during the later stages of development.

Strengthens Collaboration

Validation fosters better communication between designers and developers, leading to more efficient workflows.

For a detailed look at design validation, explore Smashing Magazine’s Guide to Design QA.

Tools for Validating Design Specs

Figma

Figma allows developers to inspect design files for precise specifications like font sizes, colors, and spacing.

Zeplin

Zeplin bridges the gap between design and development by providing detailed style guides, assets, and measurements.

Adobe XD

Adobe XD offers design specs that developers can access directly, simplifying the validation process.

PerfectPixel

PerfectPixel is a browser extension that overlays the design mockup on the live site, enabling pixel-perfect comparisons.

Chrome DevTools

Chrome’s developer tools allow you to inspect and measure elements directly in the browser to ensure they align with design specifications.

How to Validate Work Design Specs

Step 1: Prepare the Design Files

Ensure that the design files are complete and accessible. Use tools like Figma, Sketch, or Adobe XD to provide developers with measurements, assets, and style guides.

Step 2: Use a Design Overlay

Use tools like PerfectPixel to overlay the design mockup onto the live site. This visual comparison helps identify mismatched elements.

Step 3: Inspect CSS Properties

Use browser developer tools to inspect CSS properties and compare them to the specifications in the design file.

Example of validating font size in Chrome DevTools:

  1. Right-click on the element and select “Inspect.”
  2. Check the computed font size in the Styles pane.
  3. Compare it with the design specs.

Step 4: Test Across Devices

Validate the design on various devices and screen sizes to ensure responsive consistency.

Step 5: Gather Feedback

Collaborate with designers and developers to review findings and address discrepancies.

Common Design Specs to Validate

Typography

Ensure that font families, sizes, weights, and line heights match the design file.

Colors

Check that all colors, including text, backgrounds, and borders, are consistent with the provided palette.

Spacing

Validate margins, padding, and alignment to ensure that elements are spaced correctly.

Images and Icons

Confirm that images and icons are of the correct size, resolution, and placement.

Interactions

Test hover effects, animations, and click behaviors to ensure they function as intended.

Responsive Design

Validate that the layout adapts smoothly to different screen sizes and resolutions.

Challenges in Validating Design Specs

Inconsistent Measurements

Design tools and browsers may interpret measurements differently, leading to minor discrepancies.

Cross-Browser Variations

Certain styles may render differently across browsers, requiring additional tweaks.

Dynamic Content

Dynamic content, such as user-generated posts, can cause deviations from the static design.

Best Practices for Validating Work Design Specs

Establish Clear Communication

Ensure designers and developers collaborate closely during the project. Regular check-ins help prevent misunderstandings.

Use a Shared Style Guide

Create a shared style guide that outlines typography, colors, and spacing. This ensures consistency throughout the project.

Validate Iteratively

Perform validation at every stage of the development process, rather than waiting until the end.

Focus on Key Elements

Prioritize validating critical elements like navigation, calls-to-action, and forms, as these have the most significant impact on user experience.

Document Discrepancies

Keep a record of any deviations from the design specs and provide actionable recommendations for resolution.

Real-Life Applications of Design Validation

E-commerce Websites

An online retailer validated their checkout page to ensure alignment with the original design, improving user trust and conversion rates.

Corporate Websites

A consulting firm conducted design validation to maintain brand consistency across their global website.

SaaS Platforms

A SaaS company validated their dashboard’s design to ensure a seamless user experience across multiple devices.

Tools for Automating Design Validation

Storybook

Storybook helps developers test and validate UI components in isolation, ensuring they match design specs.

Visual Regression Testing Tools

Tools like Percy and BackstopJS automate visual comparisons between design mockups and live implementations.

Accessibility Testing Tools

Use tools like WAVE to validate accessibility compliance, ensuring the design is inclusive.

Monitoring and Refining the Validation Process

Collect Feedback

Gather input from stakeholders, designers, and developers to refine the validation process.

Track Revisions

Monitor the number of revisions required during the project to identify patterns and areas for improvement.

Use Analytics

Evaluate user behavior and engagement to measure the impact of design accuracy on user experience.

Conclusion

Validating design specs is a vital step in ensuring that web projects meet their intended design and functionality goals. By following the steps and best practices outlined in this guide, you can confidently validate work design specs, reducing errors and delivering high-quality websites that exceed expectations.

For more resources, explore tools like Zeplin or Storybook. With consistent validation processes, your projects will achieve the accuracy and professionalism that clients and users demand.

Published in WordPress Theme Development
on March 27, 2025

Optimizing WordPress themes is crucial for improving website speed, user experience, and search engine rankings. A fast and efficient WordPress theme reduces load times, enhances user engagement, and ensures compatibility across devices and browsers.

This guide provides actionable tips, tools, and best practices for optimizing WordPress themes, enabling developers and website owners to deliver high-performing, user-friendly websites.

Why Optimize WordPress Themes?

Faster Load Times

Optimized themes reduce unnecessary code and resources, resulting in quicker page loads.

Improved SEO Rankings

Search engines prioritize fast-loading websites, making optimization a key factor in ranking higher.

Enhanced User Experience

A responsive, fast theme keeps users engaged and reduces bounce rates, leading to better overall satisfaction.

Reduced Server Load

Optimized themes use fewer resources, ensuring smooth performance even during traffic spikes.

For an overview of why speed matters, visit Google’s Core Web Vitals.

Key Areas of WordPress Theme Optimization

Clean and Minimize Code

Eliminate redundant or unused code in your theme files to improve efficiency.

  • Remove unnecessary inline styles and scripts.
  • Use conditional loading to include only the code needed for specific pages.

Example of conditional loading:

if ( is_page('contact') ) {  
    wp_enqueue_script('contact-form', get_template_directory_uri() . '/js/contact.js', array(), null, true);  
}  

Optimize CSS and JavaScript

Minify and combine CSS and JavaScript files to reduce file sizes and HTTP requests.

Tools like Autoptimize and WP Rocket can automate this process.

Compress Images

Images are often the largest assets on a webpage. Compressing them reduces their size without sacrificing quality.

Use plugins like Smush or Imagify for efficient image compression.

Leverage Browser Caching

Enable browser caching to store static files, like images and stylesheets, locally on users’ devices.

Example of adding caching rules in .htaccess:

<IfModule mod_expires.c>  
    ExpiresActive On  
    ExpiresByType image/jpg "access 1 month"  
    ExpiresByType text/css "access 1 week"  
</IfModule>  

Use Lazy Loading

Lazy loading defers loading images and videos until they are needed, reducing initial load times.

WordPress includes native lazy loading for images since version 5.5. To enable it for videos, use plugins like Lazy Load.

Tools for Optimizing WordPress Themes

Google PageSpeed Insights

Analyze your website’s performance and receive actionable recommendations for improvement.

GTmetrix

Get detailed insights into your site’s speed and optimization with metrics like page size and HTTP requests.

Lighthouse

An open-source tool from Google that evaluates site performance, accessibility, and best practices.

Query Monitor

Identify slow database queries, scripts, and other performance bottlenecks in your theme.

Perfmatters

A plugin designed to disable unnecessary WordPress features that may slow down your site.

Steps to Optimize WordPress Themes

Step 1: Choose a Lightweight Theme

Start with a lightweight theme like GeneratePress, Astra, or Neve. These themes are optimized for speed and performance out of the box.

Step 2: Use a CDN

A Content Delivery Network (CDN) reduces latency by serving assets from servers closest to the user. Popular options include Cloudflare and StackPath.

Step 3: Optimize Database

Clean up your WordPress database by removing unnecessary data such as post revisions, spam comments, and transient options.

Use plugins like WP-Optimize to automate this process.

Step 4: Disable Unused Features

Turn off features like emojis, embeds, and Gravatars if they are not needed.

Example of disabling emojis:

remove_action( 'wp_head', 'print_emoji_detection_script', 7 );  
remove_action( 'wp_print_styles', 'print_emoji_styles' );  

Step 5: Optimize Fonts

Use system fonts or optimize web fonts by loading only the weights and styles you need.

Example of loading specific Google Fonts:

<link href="https://fonts.googleapis.com/css2?family=Roboto:wght@400;700&display=swap" rel="stylesheet">  

Best Practices for Optimizing WordPress Themes

Use Responsive Design

Ensure your theme adapts seamlessly to different screen sizes for a better user experience.

Test for Cross-Browser Compatibility

Verify that your theme works consistently across major browsers like Chrome, Firefox, Safari, and Edge.

Implement Accessibility Standards

Follow WCAG guidelines to create inclusive themes for all users.

Regularly Update Themes and Plugins

Keep your theme and plugins updated to ensure compatibility and benefit from performance improvements.

Monitor Performance

Regularly test your site’s performance using tools like Pingdom and address any issues promptly.

Common Mistakes to Avoid

Ignoring Mobile Optimization

Ensure your theme is mobile-friendly, as mobile users make up a significant portion of web traffic.

Using Too Many Plugins

While plugins are helpful, excessive plugins can slow down your site. Choose lightweight alternatives and only install what’s necessary.

Neglecting Security

An optimized theme should also be secure. Use secure coding practices and implement regular security audits.

Overloading Pages with Features

Focus on core functionality and avoid adding unnecessary elements that can bloat your theme.

Real-Life Applications of Optimized Themes

E-commerce Websites

An online retailer improved load times and increased sales by optimizing their WooCommerce theme with faster checkout pages.

Blogging Platforms

A personal blog reduced bounce rates by optimizing images, using lazy loading, and simplifying the theme’s design.

Corporate Websites

A consulting firm scaled their website efficiently by implementing CDN services and optimizing their theme for performance.

Monitoring Optimization Success

Track Speed Metrics

Use tools like Lighthouse or GTmetrix to monitor improvements in load times and overall performance.

Analyze User Engagement

Track metrics like bounce rate and average session duration using Google Analytics to evaluate user experience.

Review SEO Rankings

Monitor keyword rankings to measure the impact of improved site speed on search engine performance.

Conclusion

Optimizing WordPress themes is essential for delivering fast, reliable, and user-friendly websites. By following the steps and best practices outlined in this guide, you can create themes that excel in performance, scalability, and SEO.

For additional insights, explore WordPress Theme Development Handbook or use tools like Perfmatters. With optimized themes, your website can achieve better rankings, higher engagement, and greater overall success.

Published in WordPress Theme Development
on March 25, 2025

Custom widgets can significantly enhance the functionality and user experience of a WordPress website. By enabling dynamic and interactive elements, widgets offer developers the flexibility to display content or features in designated areas like sidebars, footers, and widget-ready zones. Knowing how to create WordPress widgets is a valuable skill that empowers developers to extend WordPress themes effectively.

This guide provides a step-by-step approach to creating custom WordPress widgets and integrating them seamlessly into your theme.

What Are WordPress Widgets?

Widgets are modular components in WordPress that allow users to add and manage features such as recent posts, search bars, social media feeds, and more in predefined widget-ready areas. These areas are typically part of a theme’s layout, like sidebars or footer sections.

Widgets can be created manually using custom code or dynamically via plugins. Popular widget examples include:

  • Calendar widgets
  • Recent posts lists
  • Custom advertisements

Why Create Custom WordPress Widgets?

Tailored Functionality

Custom widgets allow developers to create features that meet specific client needs or site requirements.

Enhanced User Experience

Widgets provide dynamic content or interactive elements that engage users and improve site functionality.

Flexible Customization

Custom widgets give developers full control over the design and functionality of widgetized areas.

Seamless Theme Integration

By designing widgets that integrate with your theme’s style and functionality, you ensure consistency and branding.

For more on WordPress widgets, visit the WordPress Widgets Documentation.

How to Create Custom WordPress Widgets

Step 1: Register Widget Areas

Before adding a custom widget, define widget-ready areas in your theme. These are locations where widgets can be added.

Example: Registering a sidebar widget area in functions.php:

function custom_theme_widgets_init() {  
    register_sidebar( array(  
        'name'          => __( 'Sidebar Area', 'textdomain' ),  
        'id'            => 'sidebar-1',  
        'description'   => __( 'Add widgets here to appear in the sidebar.', 'textdomain' ),  
        'before_widget' => '<div class="widget">',  
        'after_widget'  => '</div>',  
        'before_title'  => '<h3 class="widget-title">',  
        'after_title'   => '</h3>',  
    ) );  
}  
add_action( 'widgets_init', 'custom_theme_widgets_init' );  

Step 2: Create the Widget Class

Define a new widget class that extends the WP_Widget class. This class handles the widget’s functionality and output.

Example of creating a simple custom widget:

class Custom_Widget extends WP_Widget {  
    function __construct() {  
        parent::__construct(  
            'custom_widget',  
            __( 'Custom Widget', 'textdomain' ),  
            array( 'description' => __( 'A custom widget example.', 'textdomain' ) )  
        );  
    }  

    public function widget( $args, $instance ) {  
        echo $args['before_widget'];  
        echo '<h2>' . esc_html( $instance['title'] ) . '</h2>';  
        echo '<p>' . esc_html( $instance['content'] ) . '</p>';  
        echo $args['after_widget'];  
    }  

    public function form( $instance ) {  
        $title = ! empty( $instance['title'] ) ? $instance['title'] : '';  
        $content = ! empty( $instance['content'] ) ? $instance['content'] : '';  
        ?>  
        <p>  
            <label for="<?php echo esc_attr( $this->get_field_id( 'title' ) ); ?>"><?php _e( 'Title:', 'textdomain' ); ?></label>  
            <input type="text" class="widefat" id="<?php echo esc_attr( $this->get_field_id( 'title' ) ); ?>" name="<?php echo esc_attr( $this->get_field_name( 'title' ) ); ?>" value="<?php echo esc_attr( $title ); ?>">  
        </p>  
        <p>  
            <label for="<?php echo esc_attr( $this->get_field_id( 'content' ) ); ?>"><?php _e( 'Content:', 'textdomain' ); ?></label>  
            <textarea class="widefat" id="<?php echo esc_attr( $this->get_field_id( 'content' ) ); ?>" name="<?php echo esc_attr( $this->get_field_name( 'content' ) ); ?>"><?php echo esc_textarea( $content ); ?></textarea>  
        </p>  
        <?php  
    }  

    public function update( $new_instance, $old_instance ) {  
        $instance = array();  
        $instance['title'] = sanitize_text_field( $new_instance['title'] );  
        $instance['content'] = sanitize_textarea_field( $new_instance['content'] );  
        return $instance;  
    }  
}  

Step 3: Register the Widget

Add your custom widget to WordPress by registering it with the widgets_init action.

Example:

function register_custom_widget() {  
    register_widget( 'Custom_Widget' );  
}  
add_action( 'widgets_init', 'register_custom_widget' );  

Step 4: Test the Widget

Add your new widget to a widget-ready area via the WordPress admin panel under Appearance > Widgets and confirm it works as expected.

Tips for Better Widget Development

Make Widgets Customizable

Add options in the widget settings form to allow users to customize its appearance and functionality.

Follow WordPress Coding Standards

Ensure your code adheres to the WordPress coding standards.

Optimize for Performance

Minimize the number of database queries and avoid including heavy scripts or styles in the widget output.

Ensure Responsiveness

Test your widget on various devices to ensure it looks good and functions well across screen sizes.

Include Security Features

Sanitize all input data and escape output to prevent security vulnerabilities.

Popular Plugins for WordPress Widgets

If custom coding isn’t the best option for your project, several plugins can help you create and manage widgets:

Common Mistakes and How to Avoid Them

Overcomplicating the Widget

Focus on creating widgets that solve specific problems or provide particular features rather than overloading them with options.

Ignoring Accessibility

Ensure widgets are keyboard navigable and adhere to WCAG standards.

Failing to Test

Test widgets thoroughly in various themes and configurations to ensure compatibility.

Neglecting Internationalization

Use translation-ready text to make widgets accessible to a global audience.

Example:

__( 'Your Text Here', 'textdomain' );  

Real-Life Applications of Custom Widgets

E-commerce Websites

Create custom widgets to display featured products, sales, or promotional offers dynamically.

Blogging Platforms

Use widgets for recent posts, popular articles, or author bios to enhance user engagement.

Corporate Websites

Add custom widgets for contact forms, office locations, or team member profiles to improve usability and information access.

Conclusion

Learning to create WordPress widgets empowers developers to add dynamic, interactive features to themes, enhancing both functionality and user experience. By following the steps and best practices outlined in this guide, you can develop custom widgets that integrate seamlessly into any WordPress theme.

For more resources, visit WordPress Developer Handbook or explore plugins like Widget Options. With the right approach, widgets can elevate your WordPress projects to new levels of interactivity and usability.

Published in WordPress Theme Development
on March 20, 2025

Developing lightweight WordPress themes is a crucial step in ensuring websites load quickly, provide seamless user experiences, and perform well on search engines. Lightweight themes minimize unnecessary code, prioritize speed, and maintain essential functionality without sacrificing aesthetics.

This guide provides actionable tips, tools, and best practices for creating lightweight WordPress themes that enhance website performance while staying user-friendly.

What Are Lightweight WordPress Themes?

Lightweight WordPress themes are designed to load quickly and efficiently by eliminating bloat. These themes focus on performance and usability by using optimized code, clean design, and only the essential features required for the website to function.

Some popular lightweight themes include:

  • GeneratePress
  • Astra
  • Neve

These themes are highly customizable and often integrate well with page builders and optimization plugins.

Why Lightweight Themes Matter

Faster Loading Times

Lightweight themes reduce page size and eliminate unnecessary assets, leading to quicker load times.

Better SEO Performance

Search engines favor fast-loading websites, giving lightweight themes an edge in ranking potential.

Improved User Experience

Fast and responsive websites keep users engaged, reducing bounce rates and improving overall satisfaction.

Scalability

With minimal code and optimized performance, lightweight themes are easier to scale and adapt for future growth.

For more on the importance of lightweight themes, visit Google PageSpeed Insights.

Key Features of Lightweight WordPress Themes

Clean Code

Lightweight themes avoid excessive inline scripts, redundant code, and unnecessary functionality.

Minimal Dependencies

They rely on a minimal number of third-party scripts or plugins to reduce resource usage.

Responsive Design

Lightweight themes are optimized for all devices, ensuring seamless experiences across desktops, tablets, and mobile phones.

Accessibility

They follow accessibility standards to create inclusive websites usable by everyone, including people with disabilities.

Customization Options

While keeping the core lightweight, these themes often include hooks, filters, and simple customization options for developers and users.

Development Tips for Lightweight WordPress Themes

Use a Starter Theme

Begin with a barebones starter theme like _s (Underscores) or WP Rig. These provide a minimal foundation to build upon without unnecessary features.

Minimize HTTP Requests

Reduce the number of HTTP requests by:

  • Combining CSS and JavaScript files.
  • Using inline SVGs instead of separate image files.
  • Lazy-loading images to improve load times.

Optimize CSS and JavaScript

Use tools like Autoptimize to minify and combine CSS and JavaScript files.

Load Assets Conditionally

Only load scripts and styles on the pages where they are needed.

Example:

function load_custom_assets() {  
  if (is_page('contact')) {  
    wp_enqueue_script('contact-form-script', get_template_directory_uri() . '/js/contact.js', array(), null, true);  
  }  
}  
add_action('wp_enqueue_scripts', 'load_custom_assets');  

Limit Plugin Usage

Avoid overloading themes with features that can be handled by plugins. Instead, focus on creating a theme that integrates smoothly with essential plugins.

Optimize Images

Use tools like TinyPNG or Smush to compress images without losing quality.

Implement Lazy Loading

Enable lazy loading for images and videos to improve performance. WordPress includes native lazy loading for images since version 5.5.

Use Native WordPress Functions

Leverage built-in WordPress functions and features instead of custom code to maintain compatibility and performance.

Test Responsiveness

Ensure the theme adapts to different screen sizes by testing with tools like BrowserStack or Responsinator.

Tools for Developing Lightweight WordPress Themes

Debugging and Performance Tools

  • Query Monitor: Identifies slow queries, scripts, and other performance bottlenecks.
  • Debug Bar: Provides insights into theme performance and debugging information.

Build Tools

  • Gulp: Automates tasks like minifying CSS and JavaScript.
  • Webpack: Bundles assets for optimized delivery.

Testing Tools

  • Google Lighthouse: Evaluates site performance and provides improvement recommendations.
  • GTmetrix: Offers detailed performance analysis.

Best Practices for Lightweight Theme Development

Follow WordPress Coding Standards

Adhere to WordPress coding standards to ensure compatibility, security, and maintainability.

Validate HTML and CSS

Use tools like W3C Validator to ensure your theme adheres to web standards.

Include Accessibility Features

Follow WCAG guidelines to create themes that are inclusive and user-friendly.

Test for Cross-Browser Compatibility

Ensure the theme works consistently across popular browsers like Chrome, Firefox, Safari, and Edge.

Optimize Database Queries

Reduce database load by optimizing queries and avoiding unnecessary calls to the database.

Example:

function get_custom_posts() {  
  $args = array(  
    'post_type' => 'custom',  
    'posts_per_page' => 10,  
    'no_found_rows' => true,  
  );  
  $query = new WP_Query($args);  
  return $query;  
}  

Regularly Update Themes

Keep themes updated to ensure compatibility with the latest WordPress versions and plugins.

Benefits of Lightweight WordPress Themes

Faster Load Times

Websites built with lightweight themes load significantly faster, improving user satisfaction and SEO rankings.

Reduced Server Load

Optimized themes consume fewer server resources, making them ideal for high-traffic websites.

Better Mobile Performance

Lightweight themes perform well on mobile devices, where speed is critical for user engagement.

Easier Maintenance

With less code and fewer dependencies, lightweight themes are easier to maintain and debug.

Common Mistakes to Avoid

Adding Too Many Features

Focus on core functionality and avoid turning your theme into a multipurpose framework.

Ignoring Security

Ensure your theme is secure by following best practices, such as sanitizing user input and escaping output.

Neglecting Accessibility

Accessibility should be a priority, not an afterthought. Build themes with inclusive design principles from the start.

Overlooking Performance Testing

Regularly test your theme’s performance during development to identify and address issues early.

Real-Life Applications of Lightweight Themes

E-commerce Websites

An online store used a lightweight theme to reduce load times, improving conversions and customer satisfaction.

Blogging Platforms

A personal blogger opted for a lightweight theme to ensure their site loads quickly, retaining readers and improving engagement.

Corporate Websites

A consulting firm adopted a lightweight theme to scale their site while maintaining optimal performance.

Conclusion

Developing lightweight WordPress themes is essential for delivering fast, responsive, and user-friendly websites. By following the tips and best practices outlined in this guide, you can create themes that are efficient, scalable, and optimized for performance.

For more resources, visit WordPress Theme Handbook or explore tools like GeneratePress. With a focus on clean code, minimal dependencies, and optimized assets, lightweight themes can elevate your web development projects and provide exceptional user experiences.

Published in Efficiency and Workflow
on March 18, 2025

Prototyping is an essential step in web development that helps teams visualize, test, and refine their ideas before writing a single line of code. By creating interactive prototypes, developers and designers can align on a project’s functionality and design, reducing the risk of costly revisions later in the process.

Prototyping web development is a time-saving approach that improves collaboration, accelerates workflows, and enhances the final product’s quality. This guide explores the importance of prototyping, tools to use, and best practices to implement it effectively in your web development projects.

What Is Prototyping in Web Development?

Prototyping in web development involves creating a preliminary model of a website or application that represents its structure, functionality, and design. Prototypes can range from basic wireframes to fully interactive mockups, depending on the stage of development and project needs.

Types of prototypes include:

  • Low-Fidelity Prototypes: Basic wireframes or sketches focusing on layout and structure.
  • High-Fidelity Prototypes: Detailed and interactive mockups that resemble the final product.

For an introduction to prototyping, visit InVision’s Prototyping Guide.

Why Prototyping Saves Time

Aligns Team Expectations

Prototyping ensures that designers, developers, and stakeholders share a common understanding of the project’s goals and functionality.

Identifies Issues Early

Testing a prototype helps uncover design or usability flaws before development begins, saving time and resources.

Improves Client Communication

Prototypes provide a tangible representation of the project, making it easier for clients to provide feedback and approve designs.

Reduces Revisions

By resolving issues during the prototyping phase, teams can minimize revisions during development, accelerating the overall timeline.

Tools for Prototyping Web Development

Figma

Figma is a collaborative design tool that supports both wireframing and prototyping, allowing teams to create and share interactive designs in real time.

Adobe XD

Adobe XD offers features for creating high-fidelity prototypes, complete with animations and transitions.

InVision

InVision is a popular platform for creating interactive prototypes, gathering feedback, and collaborating with team members.

Axure RP

Axure RP is a robust tool for building advanced prototypes with dynamic content and conditional logic.

Sketch

Sketch is ideal for macOS users, providing intuitive tools for creating and sharing prototypes.

How to Prototype Effectively in Web Development

Define Goals

Before creating a prototype, clarify its purpose. Are you testing the layout, functionality, or user experience? Understanding the goals ensures that the prototype addresses specific project needs.

Choose the Right Fidelity

Select the appropriate level of fidelity based on the project phase:

  • Use low-fidelity prototypes for brainstorming and early feedback.
  • Use high-fidelity prototypes for detailed testing and client presentations.

Map Out User Journeys

Identify the key user flows and interactions to include in the prototype, focusing on the primary goals users will achieve on the site.

Use Interactive Elements

Incorporate clickable buttons, hover states, and transitions to simulate real user interactions. This helps stakeholders and testers better understand the functionality.

Gather Feedback

Share the prototype with team members, clients, and end-users to gather feedback. Use this input to refine the design and address potential issues.

Document Changes

Keep track of feedback and revisions to ensure that updates align with project goals and stakeholder expectations.

Benefits of Prototyping in Web Development

Improved Collaboration

Prototypes act as a shared reference point for designers, developers, and clients, fostering better communication and collaboration.

Enhanced User Experience

Testing prototypes with real users helps identify usability issues and refine the interface for a smoother experience.

Cost Efficiency

By addressing issues early, prototyping reduces the need for extensive revisions during development, saving both time and money.

Faster Approval

Interactive prototypes make it easier for clients to visualize the final product, leading to quicker approvals.

Best Practices for Prototyping

Start Simple

Begin with basic wireframes to focus on layout and structure. Add details and interactivity as the project progresses.

Test Early and Often

Conduct usability testing at multiple stages of prototyping to identify and resolve issues incrementally.

Focus on Key Features

Prioritize the most important features and user flows in your prototype to ensure that they align with project goals.

Involve Stakeholders

Invite stakeholders to review prototypes early and provide input to avoid surprises later in the process.

Iterate Continuously

Treat the prototype as a living document, updating it based on feedback and project changes.

Common Mistakes to Avoid in Prototyping

Overloading the Prototype

Including too many features or details in the prototype can overwhelm testers and stakeholders. Focus on core functionality first.

Skipping User Testing

Failing to test the prototype with real users may result in missed opportunities to improve usability.

Ignoring Feedback

Prototypes are only effective if feedback is incorporated into the design. Actively seek and address input from stakeholders and testers.

Using Inconsistent Tools

Ensure that the tools used for prototyping integrate well with your development workflow to avoid compatibility issues.

Real-Life Applications of Prototyping

E-commerce Websites

An online retailer used high-fidelity prototypes to test the checkout process with users, identifying friction points and improving conversion rates.

SaaS Platforms

A SaaS company created interactive prototypes to demonstrate new features to clients, receiving valuable feedback before development began.

Corporate Websites

A consulting firm developed wireframes and prototypes to present layout options to stakeholders, streamlining the approval process.

Monitoring the Effectiveness of Prototyping

Analyze Feedback

Review feedback from testers and stakeholders to identify recurring issues or suggestions for improvement.

Track Revisions

Monitor how many changes are made during development to measure the prototype’s impact on reducing revisions.

Evaluate User Engagement

Test the final product against the prototype to ensure that user engagement and functionality align with expectations.

Conclusion

Prototyping is a cornerstone of efficient web development, enabling teams to visualize, test, and refine their ideas before diving into code. By embracing prototyping web development, teams can save time, reduce costs, and deliver user-focused websites that meet client expectations.

For additional resources, explore tools like Figma or check out Nielsen Norman Group’s Prototyping Guidelines. With a well-executed prototyping process, your web development projects can achieve greater efficiency and success.

Published in Efficiency and Workflow
on March 13, 2025

In modern web design and development, maintaining consistency while enabling flexibility can be challenging. Design tokens theming solves this problem by providing a unified, scalable way to manage design properties like colors, typography, and spacing. These tokens act as the building blocks for consistent theming across applications and platforms, making customization faster and more efficient.

This guide explores the concept of design tokens, their benefits, implementation strategies, and tools that help streamline theming processes.

What Are Design Tokens?

Design tokens are reusable variables that store design decisions such as colors, fonts, spacing, shadows, and more. These tokens provide a single source of truth for a design system, ensuring consistency across projects and enabling developers to apply changes globally with minimal effort.

Example of design tokens:

{  
  "colors": {  
    "primary": "#3498db",  
    "secondary": "#2ecc71",  
    "background": "#f5f5f5"  
  },  
  "spacing": {  
    "small": "8px",  
    "medium": "16px",  
    "large": "32px"  
  }  
}  

For more details, visit W3C Design Tokens Community Group.

Why Use Design Tokens for Theming?

Consistency Across Platforms

Design tokens ensure that styles remain consistent across web, mobile, and desktop applications.

Scalability

Tokens make it easier to scale designs across projects by centralizing design decisions.

Faster Customization

By updating a token, developers can propagate changes globally, significantly reducing customization time.

Improved Collaboration

Design tokens bridge the gap between design and development teams by providing a shared language and reference.

Enhanced Maintainability

Tokens eliminate redundancy and make it easier to manage and update design properties.

Key Components of Design Tokens

Color Tokens

Define brand colors, background colors, and text colors.

Example:

"colors": {  
  "brand-primary": "#ff5733",  
  "text-primary": "#333333"  
}  

Typography Tokens

Store font families, sizes, weights, and line heights.

Example:

"typography": {  
  "font-family-base": "'Roboto', sans-serif",  
  "font-size-large": "24px"  
}  

Spacing Tokens

Define consistent spacing values for margins, padding, and layouts.

Example:

"spacing": {  
  "xs": "4px",  
  "sm": "8px",  
  "md": "16px",  
  "lg": "32px"  
}  

Shadow Tokens

Manage box shadows for components.

Example:

"shadows": {  
  "card": "0 4px 6px rgba(0,0,0,0.1)",  
  "modal": "0 8px 16px rgba(0,0,0,0.2)"  
}  

Breakpoint Tokens

Define responsive design breakpoints for consistent layouts across devices.

Example:

"breakpoints": {  
  "mobile": "480px",  
  "tablet": "768px",  
  "desktop": "1024px"  
}  

How to Implement Design Tokens

Create a Token Library

Start by identifying all the design properties used in your project, such as colors, typography, and spacing. Store these properties in a central token file.

Use a Token Management Tool

Tools like Style Dictionary or Tokens Studio can help you generate platform-specific outputs (CSS, JSON, or XML) from a single source of truth.

Integrate Tokens into Your Workflow

Use design tokens in both design tools and codebases to maintain consistency. For example:

  • Import tokens into Figma using plugins.
  • Reference tokens in your CSS, Sass, or JavaScript files.

Example in CSS:

:root {  
  --color-primary: #3498db;  
  --spacing-medium: 16px;  
}  

button {  
  background-color: var(--color-primary);  
  padding: var(--spacing-medium);  
}  

Sync Tokens with Design Systems

Integrate tokens with your design system to ensure that updates are reflected across all components and platforms.

Tools for Managing Design Tokens

Style Dictionary

Style Dictionary by Amazon transforms token definitions into formats like CSS, JSON, and Android XML.

Tokens Studio

Tokens Studio integrates with Figma to manage and apply design tokens directly within your design files.

Theo

Theo by Salesforce is a tool for transforming and formatting design tokens for different platforms.

Adobe XD or Figma Plugins

Plugins like Tokens for Figma allow designers to apply and manage tokens within their workflows.

Best Practices for Design Tokens Theming

Use Descriptive Names

Avoid generic names like blue or large. Instead, use names that describe the purpose of the token, such as button-primary-bg or font-size-heading.

Group Tokens Logically

Organize tokens into categories (e.g., colors, typography, spacing) to keep them structured and easy to navigate.

Leverage Variables

Use variables in your token definitions to reduce redundancy and simplify updates.

Example in Sass:

$primary-color: #3498db;  
$secondary-color: lighten($primary-color, 20%);  

Regularly Update Tokens

Keep tokens up to date with branding changes, design iterations, or new project requirements.

Test for Accessibility

Ensure your tokens meet accessibility standards, such as sufficient color contrast and readable font sizes.

Real-Life Applications of Design Tokens

E-commerce Platforms

An online retailer implemented design tokens to ensure consistent theming across their website and mobile app, reducing design inconsistencies and speeding up updates.

SaaS Platforms

A SaaS provider used tokens to manage themes for their dashboard, allowing customers to customize the interface with brand colors and fonts.

Corporate Websites

A corporate website adopted design tokens to align their design system with branding guidelines, ensuring visual consistency across all pages.

Benefits of Design Tokens Theming

Faster Time-to-Market

Tokens simplify the theming process, enabling teams to roll out updates and new features quickly.

Unified Design System

Tokens ensure that all components adhere to a single source of truth, reducing discrepancies.

Cross-Platform Consistency

Whether it’s a website, mobile app, or desktop application, tokens ensure that the design remains consistent across all platforms.

Challenges and How to Overcome Them

Initial Setup

Setting up tokens requires an initial investment of time and resources. Start with a small set of core tokens and expand gradually.

Adoption Across Teams

Ensure that all team members understand the purpose and use of design tokens by providing training and documentation.

Managing Updates

Frequent updates can be challenging. Use tools like Git or token management systems to track changes and maintain version control.

Conclusion

Design tokens are a powerful tool for streamlining theming and maintaining consistency across digital projects. By adopting design tokens theming, teams can enhance collaboration, accelerate customization, and build scalable, efficient design systems.

For more resources, explore Style Dictionary or plugins for Figma. With the right tools and strategies, design tokens can transform how you manage and implement themes, ensuring a cohesive and adaptable user experience.

Published in Efficiency and Workflow
on March 11, 2025

In web development, maintaining clean and scalable styles is a constant challenge, especially for large projects. Modular CSS development solves this problem by breaking styles into reusable, maintainable components. This approach improves efficiency, reduces redundancy, and ensures a consistent look and feel across your website.

This guide explores the benefits of modular CSS, how to implement it effectively, and the tools and best practices that can help you create better, more scalable styles.

What Is Modular CSS Development?

Modular CSS development is a methodology that structures CSS into smaller, independent modules. Each module is responsible for styling a specific part of a website, such as a button, navigation bar, or form. This approach prevents styles from leaking across components and makes it easier to update and reuse code.

Modular CSS development often incorporates naming conventions and methodologies like:

  • Block-Element-Modifier (BEM): A naming system for keeping styles organized.
  • Object-Oriented CSS (OOCSS): Focuses on separating structure from skin.
  • CSS Modules: A technology that scopes styles to specific components in frameworks like React or Vue.js.

For a comprehensive overview, visit CSS-Tricks’ guide to modular CSS.

Benefits of Modular CSS Development

Improved Scalability

Modular CSS allows developers to manage styles effectively as projects grow, avoiding bloated and unmanageable stylesheets.

Reusability

Modules can be reused across multiple pages or projects, saving time and ensuring consistency.

Easier Maintenance

By isolating styles, changes to one module won’t inadvertently affect other parts of the site.

Better Collaboration

Modular CSS simplifies teamwork by providing a clear structure that is easy for everyone to understand and work within.

Enhanced Performance

Smaller, focused stylesheets reduce load times and improve website performance.

How to Implement Modular CSS Development

Plan Your Style Structure

Start by outlining your site’s components and identifying common elements, such as buttons, cards, or headers.

Use a Naming Convention

Adopt a consistent naming convention to ensure styles are easy to identify and maintain.

Example of BEM:

.button {  
  background-color: #3498db;  
  color: #fff;  
}  
.button--primary {  
  background-color: #2ecc71;  
}  
.button--disabled {  
  opacity: 0.5;  
}  

Create Separate Files

Organize styles into separate files for each component or module. Use a folder structure to group related styles.

Example structure:

/styles  
  /components  
    _buttons.scss  
    _cards.scss  
  /layouts  
    _header.scss  
    _footer.scss  

Use Preprocessors

CSS preprocessors like Sass or LESS make it easier to manage modular styles with features like nesting, variables, and mixins.

Example in Sass:

$primary-color: #3498db;  
.button {  
  background-color: $primary-color;  
  &:hover {  
    background-color: lighten($primary-color, 10%);  
  }  
}  

Scope Styles with CSS Modules

If you’re using React or Vue.js, CSS Modules automatically scope styles to specific components, avoiding conflicts.

Example:

/* Button.module.css */  
.button {  
  background-color: #3498db;  
}  
import styles from './Button.module.css';  
function Button() {  
  return <button className={styles.button}>Click Me</button>;  
}  

Best Practices for Modular CSS Development

Keep Styles DRY

Avoid duplicating styles by using mixins or variables to define common properties.

Write Mobile-First Styles

Start with styles for small screens and use media queries to add styles for larger devices.

Example:

.button {  
  font-size: 14px;  
}  
@media (min-width: 768px) {  
  .button {  
    font-size: 16px;  
  }  
}  

Document Your Modules

Provide clear documentation for each module, including usage examples and dependencies.

Test for Consistency

Ensure that modules look and behave the same across all pages. Use tools like Storybook to test components in isolation.

Use Version Control

Track changes to your stylesheets using Git to ensure collaboration doesn’t result in conflicts or overwritten code.

Tools for Modular CSS Development

CSS Preprocessors

  • Sass: Offers features like variables, nesting, and partials.
  • LESS: A lightweight alternative for modular styles.

Frameworks

  • Bootstrap: Provides reusable CSS components out of the box.
  • Tailwind CSS: A utility-first framework for modular design.

Build Tools

  • Webpack: Bundles CSS modules and optimizes assets.
  • Gulp: Automates tasks like compiling Sass or LESS.

Linting Tools

  • Stylelint: Enforces consistent coding styles in your CSS.

Common Mistakes and How to Avoid Them

Over-Nesting

Excessive nesting in preprocessors can make stylesheets harder to read and maintain. Keep nesting levels shallow.

Ignoring Naming Conventions

Inconsistent naming leads to confusion and conflicts. Stick to a system like BEM or OOCSS.

Bloated Stylesheets

Remove unused styles regularly to keep your stylesheets lean. Tools like PurgeCSS can help automate this process.

Lack of Testing

Always test your modules across different devices and browsers to ensure consistent performance.

Real-Life Applications of Modular CSS

E-commerce Platforms

An online retailer used modular CSS to create reusable styles for product cards, ensuring consistent branding across hundreds of pages.

Blogging Platforms

A blogging site adopted BEM naming conventions to manage styles for articles, author profiles, and comment sections efficiently.

Corporate Websites

A consulting firm implemented modular CSS to build a scalable website, enabling them to add new services pages without overhauling existing styles.

Monitoring and Optimizing Modular CSS

Analyze Load Times

Use tools like GTmetrix to measure the impact of your styles on website performance.

Conduct Audits

Regularly review your stylesheets to identify redundant or unused styles.

Gather Feedback

Ask your team for feedback on the maintainability and reusability of your modular styles.

Conclusion

Modular CSS development is a game-changer for managing styles in web projects. By structuring styles into independent modules, teams can improve efficiency, maintain consistency, and scale projects effortlessly.

For additional resources, visit CSS-Tricks’ Guide to BEM or explore tools like Sass. With the right techniques and tools, modular CSS can transform your development process, making your stylesheets more powerful and easier to manage.

Published in Web Development for Designers
on March 6, 2025

Creating a seamless design to deployment workflow is essential for efficient web development. A structured workflow bridges the gap between design and code, ensuring that projects progress smoothly from concept to launch. With the right tools, strategies, and collaboration techniques, teams can streamline their processes, reduce errors, and deliver high-quality websites efficiently.

This guide walks through each phase of the workflow, from design to deployment, providing actionable insights and best practices to optimize your project’s lifecycle.

Understanding the Design to Deployment Workflow

The design to deployment workflow encompasses all stages of a web development project, beginning with the initial design concept and ending with a live, fully functional website. This workflow includes:

  • Conceptualizing and designing the project.
  • Translating designs into code.
  • Testing for functionality, performance, and accessibility.
  • Deploying the website to a live server.

A clear and efficient workflow ensures that teams stay aligned, deadlines are met, and the final product meets client and user expectations.

Benefits of a Streamlined Workflow

Faster Development

A structured workflow eliminates redundant tasks, ensuring that the project moves swiftly from one stage to the next.

Improved Collaboration

Defined processes encourage better communication and collaboration between designers, developers, and stakeholders.

Reduced Errors

By addressing potential issues at each stage, teams can minimize bugs and inconsistencies in the final product.

Higher Quality

A well-defined workflow ensures that every detail is accounted for, resulting in a polished and professional website.

Stages of the Design to Deployment Workflow

Design Phase

The design phase involves creating wireframes, prototypes, and visual designs that define the website’s look and feel.

Key steps:

  • Wireframing: Outline the website’s structure and layout using tools like Figma or Sketch.
  • Prototyping: Build interactive prototypes to test usability and gather feedback.
  • Visual Design: Develop detailed mockups that include typography, colors, and imagery.

For best practices in design, refer to Adobe’s Design Guidelines.

Development Phase

During the development phase, designs are translated into code, ensuring that the website functions as intended.

Key steps:

  • HTML/CSS Structure: Build the website’s structure using semantic HTML and style it with CSS or preprocessors like Sass.
  • JavaScript Functionality: Add interactivity and dynamic features using JavaScript frameworks like React or Vue.js.
  • Component Libraries: Use design systems or component libraries like Bootstrap for faster development.

Testing Phase

The testing phase ensures that the website performs well across devices, browsers, and screen sizes.

Key steps:

  • Functional Testing: Verify that all features, such as forms and navigation, work as intended.
  • Performance Testing: Use tools like Google PageSpeed Insights to measure load times and optimize performance.
  • Cross-Browser Testing: Ensure compatibility with major browsers using platforms like BrowserStack.
  • Accessibility Testing: Check for compliance with accessibility standards, such as WCAG, to ensure inclusivity.

Deployment Phase

The deployment phase involves launching the website on a live server and ensuring its ongoing maintenance.

Key steps:

  • Version Control: Use Git repositories on platforms like GitHub to manage code and track changes.
  • Continuous Integration: Automate testing and deployments using CI/CD pipelines with tools like Jenkins or GitLab.
  • Hosting: Deploy the website to hosting platforms like Netlify or AWS.
  • Monitoring: Set up tools like Google Analytics to track performance and user behavior.

Tools to Enhance the Workflow

Project Management Tools

Platforms like Asana or Trello help teams track progress, assign tasks, and collaborate effectively.

Design Collaboration Tools

Tools like Zeplin and InVision streamline the handoff between designers and developers by providing detailed specifications.

Version Control Systems

Git enables teams to collaborate on code efficiently, ensuring that changes are tracked and conflicts are resolved easily.

Testing and Debugging Tools

Use Lighthouse for performance audits and WAVE for accessibility checks.

Deployment Platforms

Platforms like Vercel and Heroku simplify deployments with user-friendly interfaces and automation options.

Best Practices for an Efficient Workflow

Define Clear Roles

Establish clear responsibilities for each team member to prevent overlaps and ensure accountability.

Use a Mobile-First Approach

Design and develop for smaller screens first, then scale up for larger devices to ensure a responsive experience.

Maintain Consistent Documentation

Document design decisions, coding standards, and testing protocols to keep the team aligned.

Leverage Automation

Automate repetitive tasks like testing, builds, and deployments to save time and reduce human error.

Encourage Regular Feedback

Hold regular check-ins and feedback sessions to address issues early and keep the project on track.

Common Challenges and How to Overcome Them

Communication Barriers

Use communication tools like Slack or Microsoft Teams to keep everyone connected and informed.

Scope Creep

Define the project scope clearly at the beginning and use project management tools to track changes.

Lack of Testing

Incorporate automated and manual testing at every stage to identify and fix issues promptly.

Resource Constraints

Prioritize critical tasks and use pre-built components or frameworks to optimize resource allocation.

Real-Life Applications

E-commerce Websites

A retail company implemented a streamlined workflow to launch an online store within a tight deadline, leveraging automation tools and collaborative platforms.

Corporate Websites

A consulting firm adopted a mobile-first approach and component-based design system, ensuring scalability and responsiveness across their website.

SaaS Platforms

A SaaS provider used CI/CD pipelines to deploy updates efficiently, minimizing downtime and improving user satisfaction.

Monitoring and Improving the Workflow

Analyze Metrics

Track project timelines, task completion rates, and performance metrics to identify areas for improvement.

Conduct Post-Mortems

After each project, hold a post-mortem to discuss what went well and what could be improved in the workflow.

Stay Updated

Keep up with the latest tools and best practices in design and development to enhance your workflow continuously.

Conclusion

A well-defined design to deployment workflow is the backbone of successful web development projects. By following the strategies, tools, and best practices outlined in this guide, teams can deliver high-quality websites efficiently, meeting both client and user expectations.

For more insights, explore resources like Smashing Magazine’s Workflow Guides or tools like Zeplin. With the right workflow in place, your team can tackle even the most complex projects with confidence and precision.